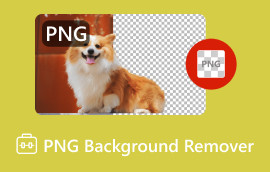
How to Delete Background from PNG Photos in 4 Fast Methods
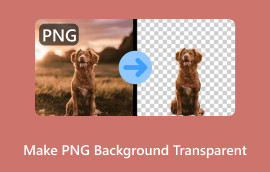
Many people remove backgrounds from PNG photos for several reasons. Some plan to use it for their business or promotion. Others want to hide the unnecessary backgrounds to post on social media. Whatever reasons you may have, it is vital to learn how to remove background on PNG images. If you’re struggling to know how and which is the right tool to use, keep reading here. We will walk you through the steps-by-step tutorial in removing the backdrop from your images using reliable tools.

- Part 1. Remove Background PNG with MindOnMap Background Remover
- Part 2. Remove PNG Background in Photoshop
- Part 3. How to Remove PNG Background in CapCut
- Part 4. How to Remove PNG Background in Google Slides
- Part 5. FAQs About How to Remove PNG Background
Part 1. Remove Background PNG with MindOnMap Background Remover
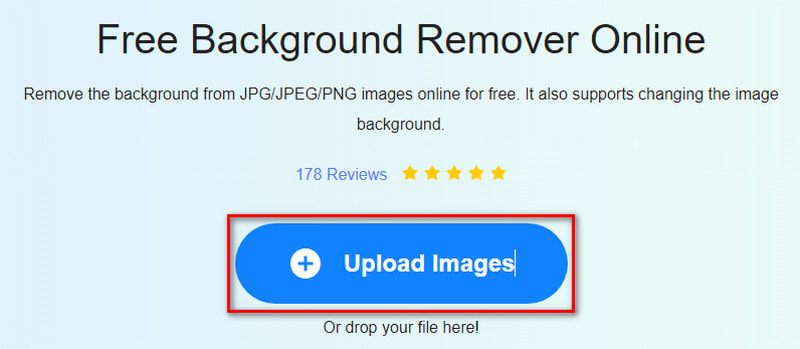
There are actually tons of tools you’ll find that can assist you in removing PNG backgrounds. But it’s hard to choose the perfect one. With that, the best method that’s worth trying is MindOnMap Free Background Remover Online. It is a tool that will allow you to remove background from PNG, JPEG, and JPG photos. Also, it uses AI technology to isolate people, animals, or products from their background in your photos. Thus, it offers a convenient way to do it without any hassle. In fact, you can even remove a white background from PNG and other backdrops. Apart from that, it offers brush tools that you can use to eliminate the backdrop yourself. Plus, you can change your image background to solid colors and use another photo. Finally, it also lets you use basic editing tools like cropping, rotating, and flipping. Here’s how to use this:
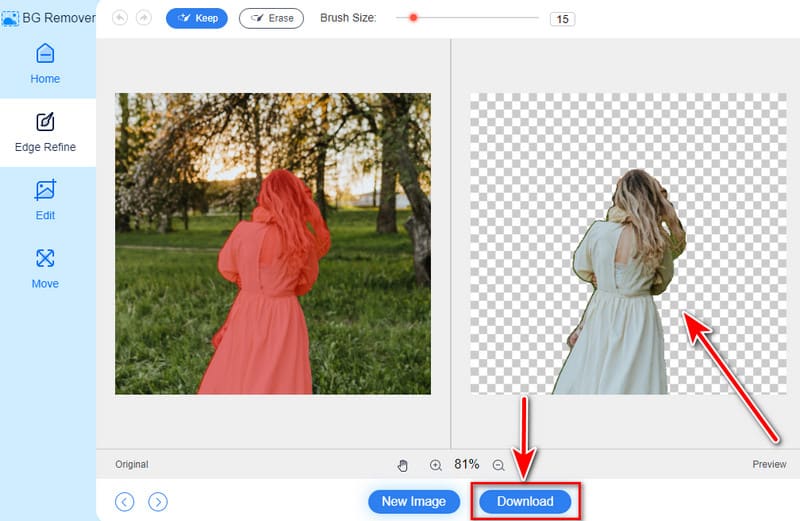
First off, visit the official website of MindOnMap Free Background Remover Online. Then hit the Upload Images option you’ll find there and select your PNG image.
Secondly, it will add and process your PNG photo and remove the background. For further fine-tuning, use the Keep or Erase brush tools.
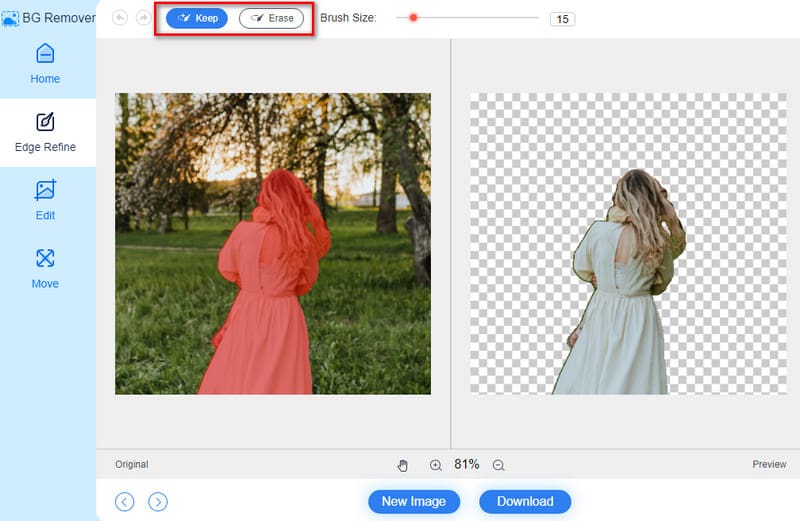
Optionally, you can go to the Edit or Move section to edit your PNG image and its background. When you’re satisfied already, export it by clicking the Download button.
PROS
- Offers a straightforward method to remove image background.
- It supports commonly-used formats to erase background from.
- It preserves the original image quality during and after the removal process.
- No watermark is added when you save it.
- Accessible on various browsers and devices.
CONS
- It requires an internet connection for you to use it.
Part 2. Remove PNG Background in Photoshop
Another tool you can use is Photoshop. It is one of the popular photo editing tools today. The good thing is that it also offers a method to remove image backgrounds. As a matter of fact, it provides plenty of options to do it. It offers tools such as Magic Eraser, Background Eraser, and Quick Action. In this part, we’ll share the steps to erase the backdrop using the Quick Action tool. With it, you can quickly accomplish your task without doing it manually.
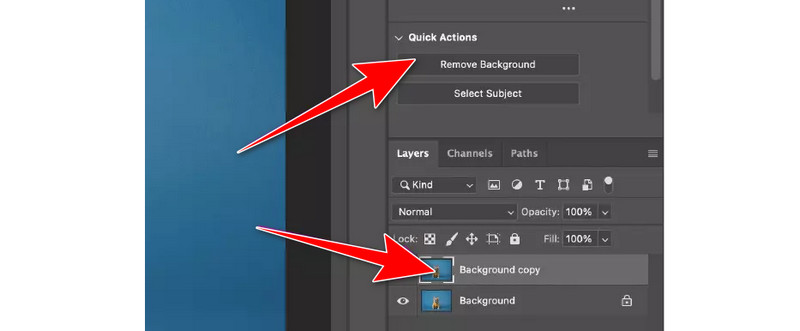
Launch the installed Photoshop on your computer. Open your PNG photo in the software. Go to the Window tab and select the Layers option.

Then, make a duplicate layer. Press Control + A for Windows or Command + A for Mac computer. Now, copy the image by hitting Command/Control + C this time. Next, press Control/Command + V to paste it on the created layer.
On the right panel, you will see the Layer palette. Hide the background layer by hitting the eye button.
Next up, head to the Properties section on the right pane still. From there, you’ll find the Quick Action section, and you just have to click the Remove Background option.
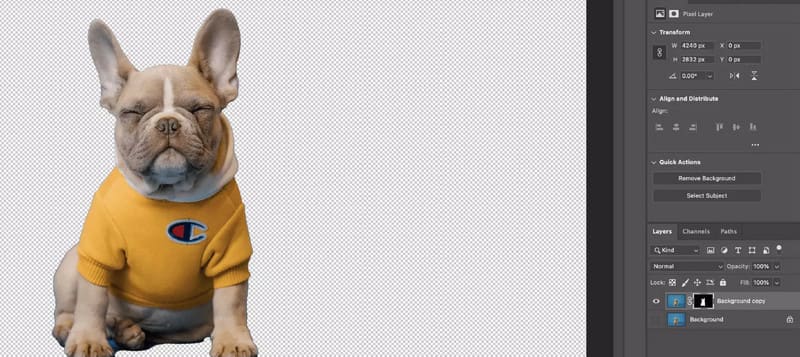
When the tool finishes analyzing it, it will automatically remove the background of your PNG image. Finally, you can go to the File tab, choose Export, then Export As to save it on your local storage. And that’s it!
PROS
- It offers a high level of precision to meticulously select and refine edges.
- It provides professional-grade background removal tools.
- It maintains the sharpness and clear subject edges after the background removal.
CONS
- Its extensive features may overwhelm beginners.
- Adobe Photoshop is a premium software requiring a subscription.
- It is resource-intensive and needs a robust computer system.
Part 3. How to Remove PNG Background in CapCut
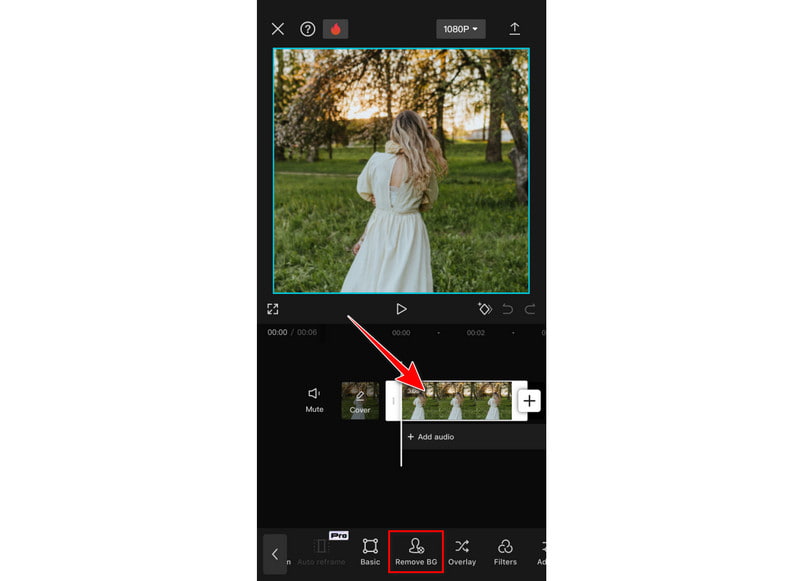
CapCut is a well-known video editing app. Apart from allowing you to enhance videos, it also offers ways to modify images. Many users often seek ways to remove backgrounds from PNG images within the app. Luckily, the tool has a Remove BG feature with options to do it automatically or manually. Afterward, you can turn it into a video or add it to whatever you’re working on. Plus, it supports JPG, JPEG, HEIC, PNG, and so on. Now, here’s how to cut out background PNG:
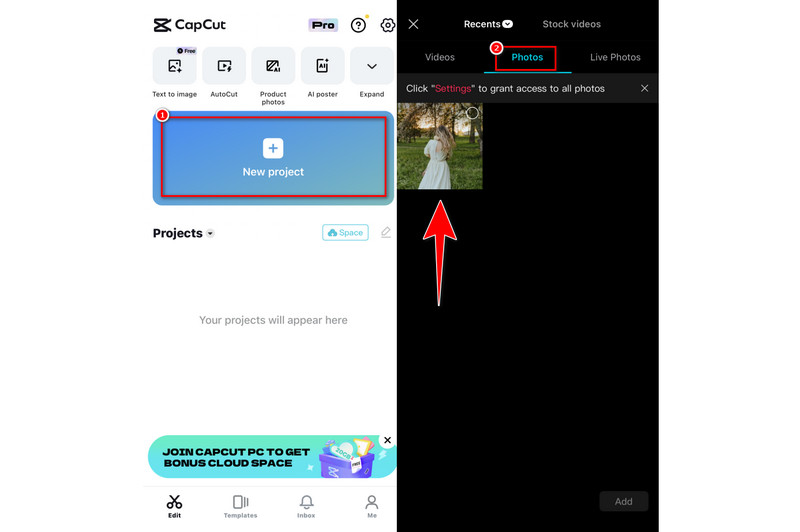
First of all, install CapCut on your Android/iOS device. Launch the app afterward.
From the app’s main interface, click the New Project button. Then, go to the Photos option to tap and choose your PNG image. Now, tap Add.
Next up, click the timeline, and various options will be at the bottom of your current screen. Slide it until you see the Remove BG option. Then, tap it.
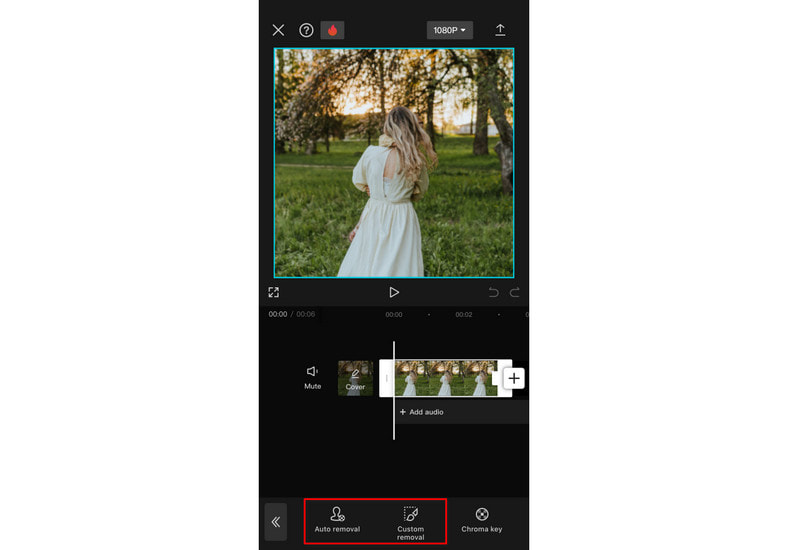
After that, you can use the Auto removal or Custom removal options. Once you’re satisfied, tap the check button.
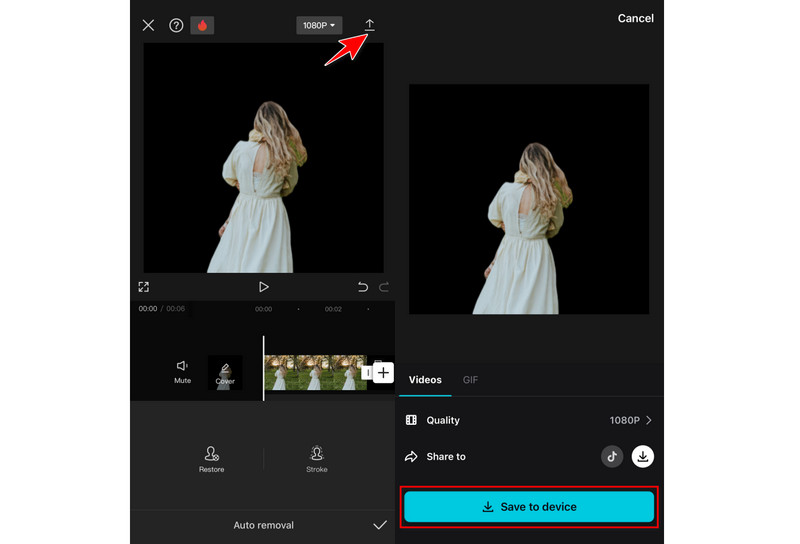
Finally, choose the Share button and tap Save to the device to export it to your phone. And that’s it!
PROS
- It enables editing both videos and photos in the same app.
- The removal procedure is very quick.
- It provides quick results after the editing or modification.
- It is handy since you can access it on your mobile device easily.
CONS
- It might not keep every detail of the main subject with complicated backgrounds.
- It compromises the quality during and after the removal process.
Part 4. How to Remove PNG Background in Google Slides
If you’re using Google, you are probably familiar with Google Slides. Although it is used for presentations, you can also use it to remove PNG background for free. It also offers a quick and accessible tool to eliminate distracting and unwanted backdrops. With it, you can easily transform your PNG photo background to transparent. Aside from that, you can change the background of your slide using solid colors or images. For now, learn how to remove PNG background using it:
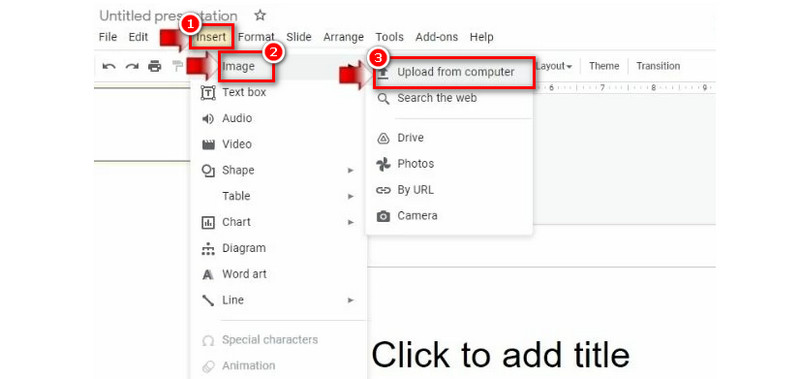
To start with, open your browser and go to Google Slides. Choose and open a blank presentation. Head to the Insert tab and choose Image to upload your PNG image.
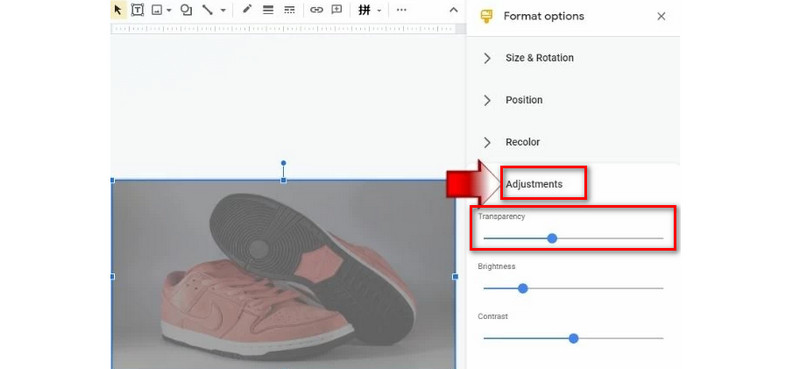
After adding the PNG image to your presentation, click it. Then, go to the Format options from the toolbar that will appear.
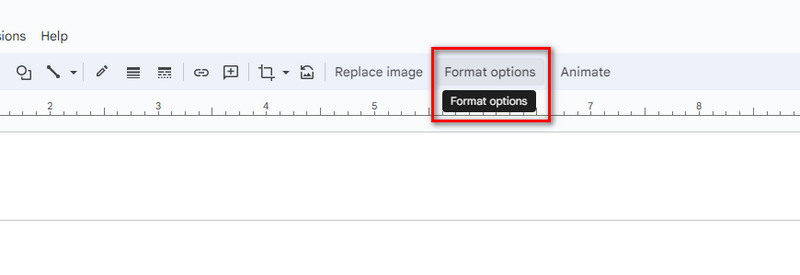
Under Format options, click the Adjustments option. From there, you’ll find a slider under the Transparency option. Use it to adjust the transparency of your PNG image.
PROS
- It is easy to use and accessible to all users.
- It provides a quick method to remove image backgrounds.
- It allows collaboration and sharing since it is cloud-based.
- Image quality is maintained during the removal process.
CONS
- It lacks precision offered compared to other tools.
- The controls are not detailed enough for users to adjust their image backgrounds.
- It is dependent on an internet connection.
Part 5. FAQs About How to Remove PNG Background
How do I remove the background from a PNG in PowerPoint?
Launch the PowerPoint software on your computer first. Go to Insert > Pictures to choose and add your PNG photo. Then, head to the Picture Format tab and select Remove Background. It will immediately detect the background, and you can adjust it if you want. Finally, hit the Keep Changes button.
How do I remove the background from a PNG AI?
If you’re in need of an AI to remove background from a PNG, use MindOnMap Free Background Remover Online. It uses an AI tool to erase the background from a PNG photo. Visit its official website and click the Upload Images button. Finally, the tool will process your image and remove your PNG image background.
How do I remove a PNG background in Canva?
To remove background using Canva, first, you need to subscribe to its Pro version. Then, from your browser, access its website. Click the Create a Design button and select Import File. Now, choose the Edit photo button and select BG Remover.
How do I make a PNG background transparent in Paint?
Do it by launching the MS Paint on your computer. Click the File tab and choose Open. Add the PNG photo and head to Select from the toolbar. Choose Transparent selection and Free-form selection from the Select section still. Choose the area from the photo you want to keep. Then, copy and paste it into another Paint window.
Conclusion
In the end, that’s all you need to know on how to remove background from PNG. As you can see, there are many ways to do this task. By now, you might have chosen the one for you. If the method you want is straightforward and has no cost at all, there’s a tool that we recommend. None other than the MindOnMap Free Background Remover Online. Whether you’re a professional or a beginner, you can enjoy using it without any restrictions.