Learn How to Create a Decision Tree on Word
Decision Trees are a great way of setting aside your emotions when making critical decisions. By using decision trees, you can focus on the crucial decisions and possibilities you will encounter. Also, with decision trees, you can focus on the data in your decision to make wise choices for your organization or business. Moreover, there are many applications and software that you can use to create decision trees. And with Microsoft Word, you can make a decision tree easily. Therefore, if you want to know more details about how to make a decision tree in Word, then read this article until the end.

- Part 1. Steps on How to Make a Decision Tree in Word
- Part 2. Pros and Cons of Using Word to Build a Decision Tree
- Part 3. Best Alternative to Word on Drawing a Decision Tree
- Part 4. FAQs about How to Create a Decision Tree in Word
Part 1. Steps on How to Make a Decision Tree in Word
Microsoft Word is the most popular commercial word processor that Microsoft develops. It was initially launched in 1983, and since then, it has become a popular word-processing application and has been revised many times to improve its service. With Microsoft Word, you can type documents professionally. But many users do not know that with Microsoft Word, you can also make decision trees, which you can use on the documents you create. So, in this part, we will demonstrate how to build a decision tree in Word. Note that with Microsoft Word, you can create a decision tree with two methods. You can either use the SmartArt or the shape library. Both these two ways are effective and great for making a decision tree. And below, we will teach you how to use these two methods for making a decision tree in Word.
Steps on how to make a decision tree in Microsoft Word using the SmartArt graphics
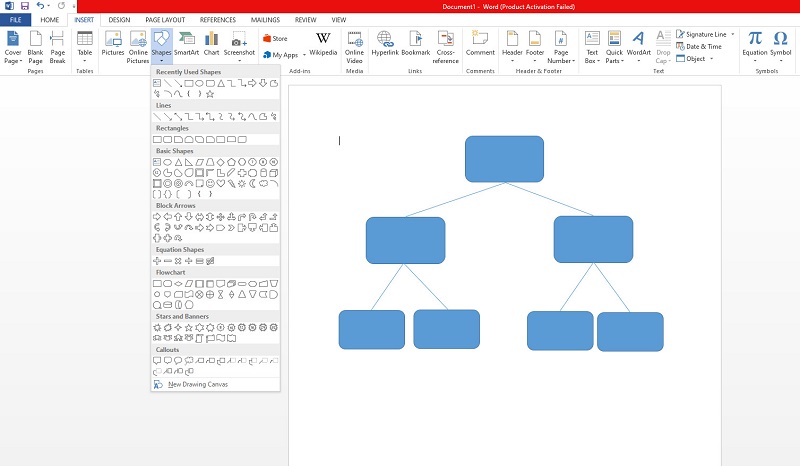
If Microsoft Word is not yet installed on your computer, download and install it and launch the app immediately. Once launched, go to Insert > Illustrations > SmartArt. And a pop-up window will be opened.
Then, go to Hierarchy and choose the diagram you want to use as a decision tree. Click OK to use the graph that you selected.

Next, double-click Text to input the text you need to insert. You can also use the Text pane to put text on the shapes.
To add more branches to your decision tree so it will be bigger, click the Add Shapes on the Graphics panel. You can also change or modify the color of the shapes to make your decision tree more professionally made.
And then, save your project once you make your decision tree. To save your spreadsheet, go to File and click Save.
Steps on how to draw a decision tree in Word using the Shape library
Open Microsoft Word on your desktop and navigate to Insert > Illustrations > Shapes. Then, you will see a drop-down menu that will prompt you.
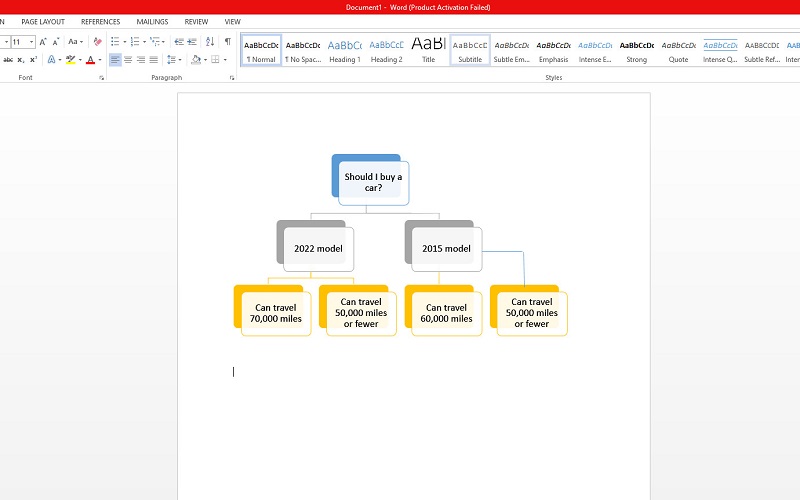
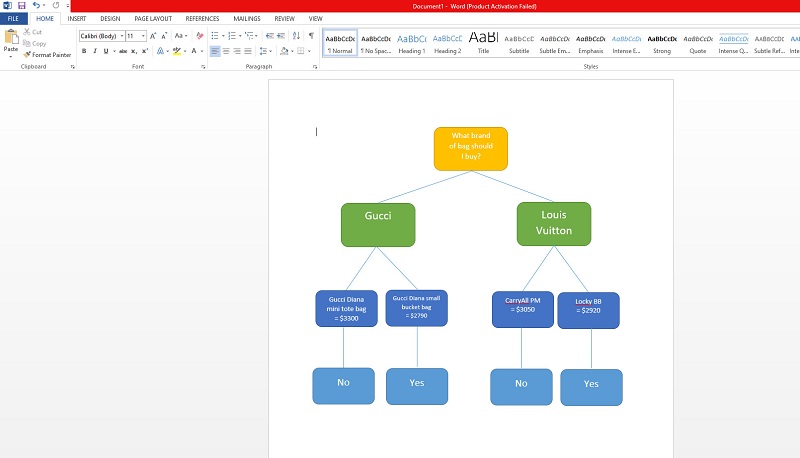
And then, use the shape library to add shapes to start your decision tree. Start with the main topic, and add branches to your decision tree. You can use the line segment to connect the components to the main topic.
Now, go to the Insert tab to add text to the shapes and click Shapes. And on the drop-down list of shapes, select the Text Box option. You can also modify the shapes to differentiate them from one another.
Finally, save your output by clicking the File > Save button. Select the location of your decision tree, then voila! You now have a decision tree to share or send to your friends or colleagues.
Part 2. Pros and Cons of Using Word to Build a Decision Tree
Microsoft Word is indeed a great application. It is not just software for creating documents. Who would imagine that with this application, you can create diagrams such as a decision tree. However, just like other tools, Microsoft Word also has a set of drawbacks that you need to consider. Read below to learn the advantages and disadvantages of using Microsoft Word to make a decision tree.
PROS
- With Microsoft Word, you can create a decision tree easily.
- It has easy-to-navigate functions.
- You can adjust the color and size of the shapes that you include.
- You can easily add text to the shapes.
- You can import images on your decision tree.
- It has an easy exporting process.
- It is safe and free to download.
CONS
- It was not originally a diagram maker application.
- Has a few editing features for creating diagrams.
- You can only make simple decision tree diagrams with this application.
Part 3. Best Alternative to Word on Drawing a Decision Tree
Since Microsoft Word is not originally a diagram-making application, many people search for diagram-making tools. Also, people do not conform to using Microsoft Word to make a decision tree because it lacks features for making one. So, you can use this alternative that we will show below.
MindOnMap is a diagram-making application that enables you to create a decision tree. It is safe to use, and you can use it for free. You can use the tree map or the right map to make your decision tree. MindOnMap is a user-friendly application because it has an intuitive user interface. Moreover, you can add icons, stickers, images, and links to your decision tree if you want it to look professionally done. Also, you can easily export your output in different formats, such as PNG, JPG, JPEG, PDF, SVG, and DOC. Furthermore, MindoOnMap has an automatic saving feature; so if you accidentally close the app, you can always continue your work without having to restart making one.
How to make a decision tree using MindOnMap
On your browser, search MindOnMap in your search box. And then, the app will require you to sign in or log in to your account. And then, click Create Online to start making a decision tree.
Secure Download
Secure Download
Then, tick the New button and select the Flowchart option to create a decision tree.

On the following interface, you will see the shapes that you can use to create a decision tree. Select the rectangle shape to create the main topic. Then, select the line on the shape panel to create branches.
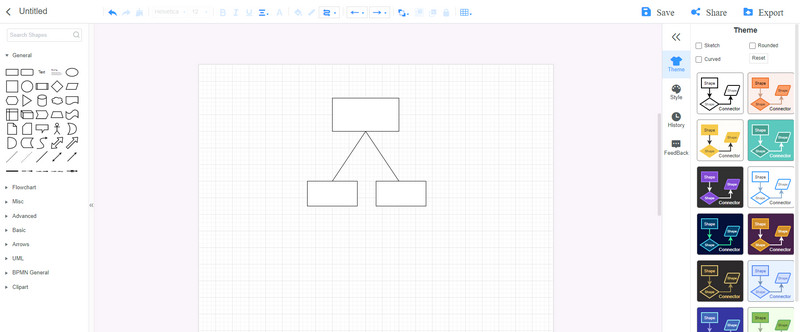
Double-click a node to add texts on the nodes, and then type the text you need to input.

MindOnMap allows you to work with your team when using their app. Click the Share button, then copy the link to share your decision with your team. Now you can work with them, with the decision tree you are making.
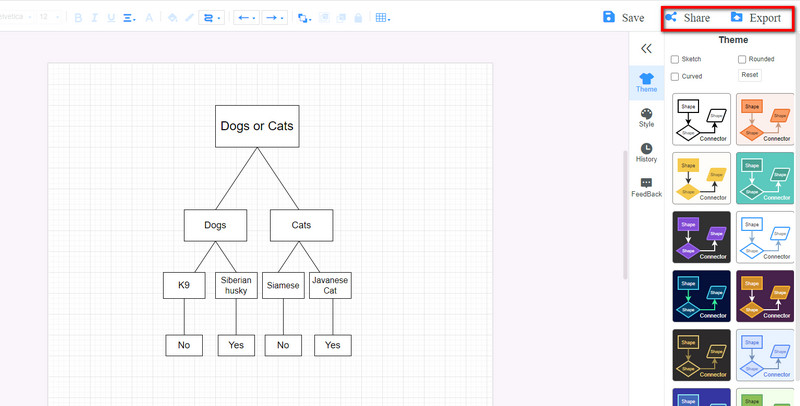
But if you want to save your output, click the Export button and choose the format you want.
Part 4. FAQs about How to Make a Decision Tree in Word
Can I use a decision tree template in Word?
No. There are no decision tree templates in Microsoft Word. However, if you use the SmartArt graphics from the Hierarchy template, you want to make a decision tree.
Can I make Flowcharts in Word?
Yes. You can use the Shapes panel or the SmartArt graphics from the Insert tab. In the SmartArt graphic, you will find tons of graphic options that you can use for Flowcharts.
What is the importance of a decision tree?
With decision trees, you can evaluate the possible outcomes or choices you need to consider when choosing a specific option or possibility. It also allows you to handle continuous and categorical variables.
Conclusion
Now that your query about how to do a decision tree in Word is answered, you can do the steps mentioned above. Indeed it is easy to make a decision tree in Word. However, as discussed above, it was not originally a diagram-making application. Therefore, if you prefer using a tool that has many features in creating decision trees, and was initially a diagram-making application, use MindOnMap now.