Complete Guidelines on How to Create a Timeline in Lucidchart
From the name itself, a timeline is a line of events that organizes them in chronological order. It usually displays someone’s or organization’s life, picking big and important events. The visual tool uses dates to show when they took place and ended. In other words, you are writing down history in order from the beginning to the end.
Conventionally making this chart typically consists of a pen and paper. However, this method is labor-extensive. Hence, programs like Lucidchart are developed to make the process of creating a timeline quick and easy. If you wish to learn how to operate this app, follow the Lucidchart timeline tutorial below.

- Part 1. How to Create a Timeline with the Best Alternative to Lucidchart
- Part 2. How to Create a Timeline in Lucidchart
- Part 3. FAQs About a Timeline
Part 1. How to Create a Timeline with the Best Alternative to Lucidchart
MindOnMap is one of the best tools for creating diagrams and charts. It provides various themes you may edit to make them your own. Therefore, making a creative and stylish timeline is possible. The icons and symbols offered by the program let you make a comprehensive timeline. Moreover, you can share your work with your peers via the link to the map or chart. Users may also secure their work with a password and date validation.
Above all, flowcharts and diagrams are highly customizable because you can personalize the branch color, fill, border, thickness, font style, and many more. In addition, the program can be exported in document and image formats to suit your needs. Overall, MindOnMap is the best alternative to create timelines and charts. Find out how this program works by following the steps below.
Secure Download
Secure Download
Select a layout
Before anything else, open your favorite browser and go to the official site of MindOnMap. From the home page, hit the Create Your Mind Map button and register for an account to access the tool. Once done signing up, you will arrive at the program’s main interface.

Access the web-based app
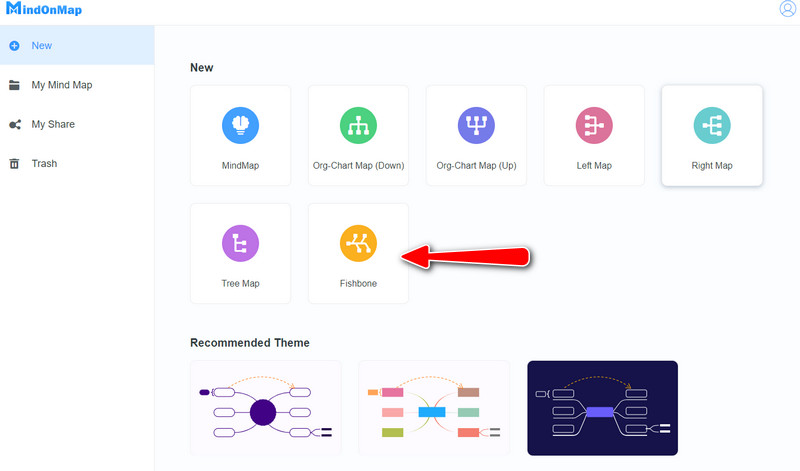
From the main window, you will see different layouts and themes available. You can start from one of the recommended themes or create from scratch by selecting a layout. In this tutorial, we will be choosing Fishbone for making a timeline.
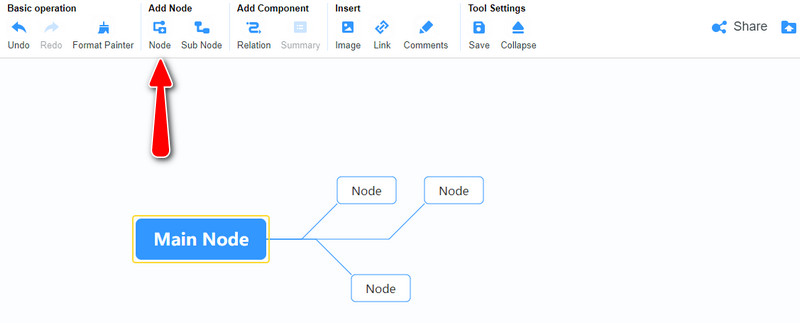
Add nodes for the events
Now, select the central node and hit Tab to add branches. You can also click the Node button on the above menu when adding branches. After that, double-click on your target node and insert the information like dates and events.
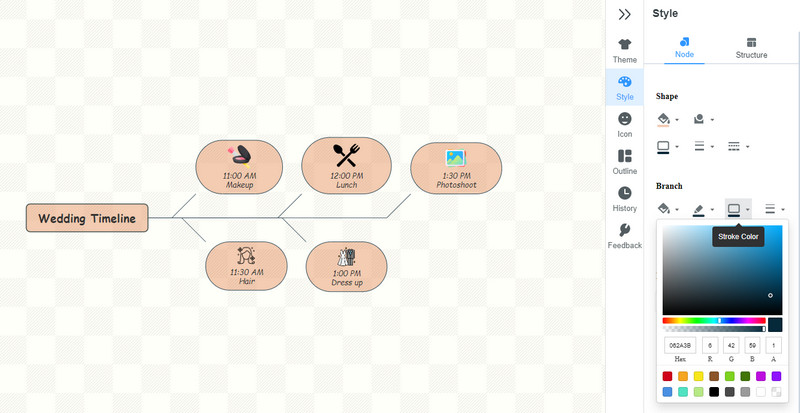
Customize the timeline
This time, personalize your timeline. You can do this by opening the Style menu on the right-side panel. You may modify the shape, color, border thickness, etc. You are also permitted to change the branch layout, font color, style, alignment, etc. If you wish to attach pictures, hit the Image button above and select the photo to insert.
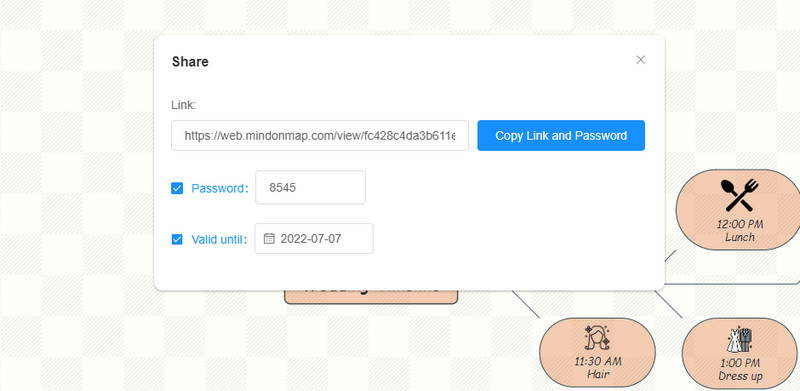
Share the timeline
You may share your maps with your peers or colleagues. Do this by clicking the Share button at the top right portion. From the dialog box, put a checkmark on the options like Password and Valid until to add a layer of security and expiration date.
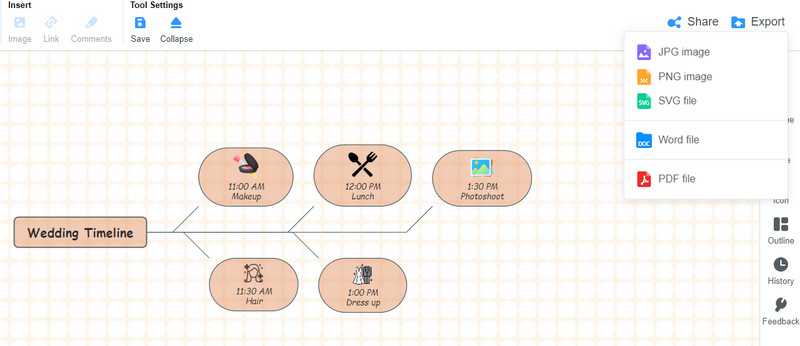
Export the timeline
If satisfied and delighted with your work, hit the Export button and select a file format. On the other hand, you may close the program immediately and return to where you left off. There are no changes once you open the timeline again.
Part 2. How to Create a Timeline in Lucidchart
With Lucidchart, creating timelines, diagrams, and flowcharts seems to be a simple affair. It comes with pre-made templates that are perfect for every situation and occasion. In other words, you can also start from a Lucidchart timeline template with this program. You can access the product delivery timeline, coordination plan, daily schedule, and many more.
The timeline maker can be helpful whether you are using it for business or education. Importing Visio files is possible if you want to cross-work from one diagram maker to another. Moreover, it offers timeline icons and shapes integrated with dates for convenient editing. Beyond that, you can also customize the dates, milestones, and intervals. On the other hand, follow the instructional guide below to learn how to create a timeline in Lucidchart.
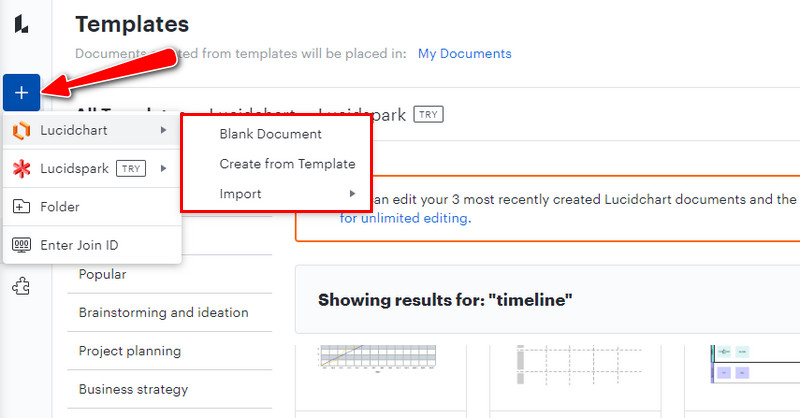
Gather the historical data you need and visit the program using a browser. Next, create an account and open a new blank canvas. Tick the Plus sign button on the left sidebar and select Lucidchart. Select Blank Document or Create from Template.
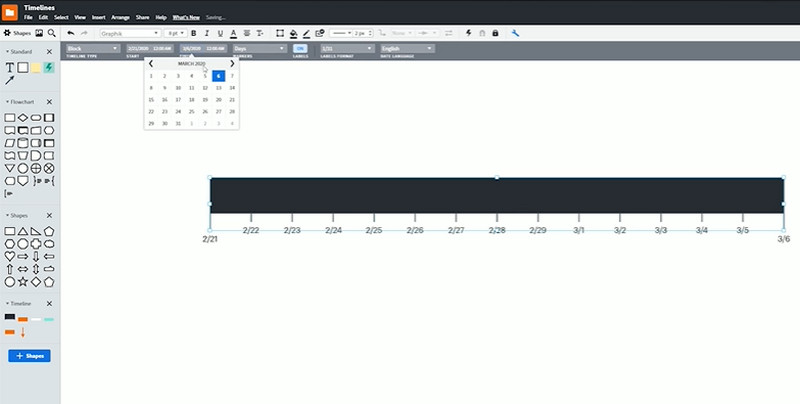
After gathering the historical data, select timeline shapes on the left sidebar menu and drag these elements on the Lucidchart canvas. You can choose a thin line or large block according to your needs. Then, stretch it as wide as you like.
Now, edit the dates and formats. Depending on your topic, you can modify it to reflect minutes, hours, weeks, months, and even years.
At this point, you may show significant events and dates or periods by adding milestones and intervals. Add an arrow shape between the events and indicate the interval or milestone by editing its text.

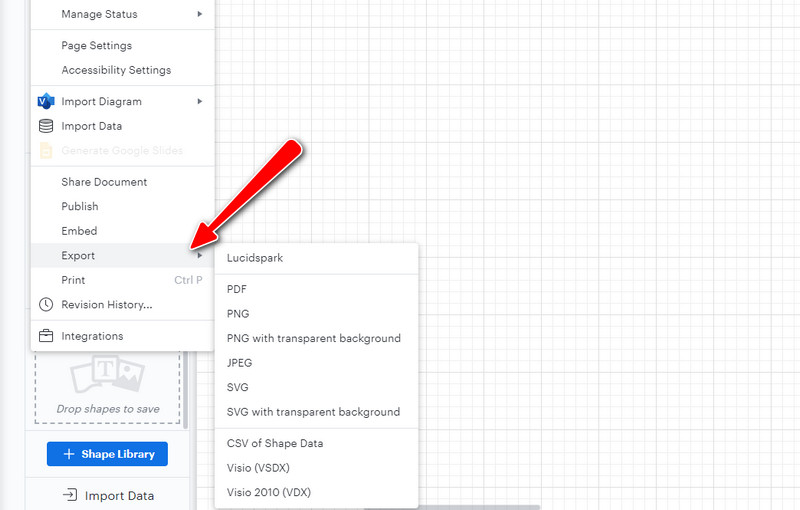
If you are through editing with editing the timeline, you can save your timeline immediately. Also, there are different formats available. Go to File > Export and choose your desired format.
Further Reading
Part 3. FAQs About a Timeline
Are there Lucidchart timeline template examples in the tool?
Yes. Lucidchart offers templates for making timelines that will help you create stylish timelines. Hence, if the designing timeline is an issue, these timeline templates are helpful for you.
What are the types of timelines?
Depending on your situation, timelines can be helpful. When trying to investigate the progress of your company or organization. There are Gantt charts, vertical bar charts, chronology charts, static and interactive timelines.
Can I make a timeline in PowerPoint?
Yes. PowerPoint is infused with a SmartArt graphic that offers various graphical representations, like timelines. Therefore, you can quickly and easily create a timeline using PowerPoint.
Conclusion
There are conventional and modern ways to make a timeline chart, as you already know. Lucidchart is one of those programs that enable you to make a timeline. Hence, we provided a Lucidchart timeline tutorial to help you create one. However, you cannot access timeline shapes in Lucidchart unless you upgrade your account to VIP. That is why we provided you with the best Lucidchart alternative, none other than MindOnMap. This program is beneficial if you want to make a decent and good timeline online without even shelling out a dime.