Ultimate Guide on How to Sharpen Images in Photoshop
Do you need to sharpen images in Photoshop? Do not hesitate to do it just because you do not know how to execute it. This article will be your guide in learning the expert way to refine your photos. We cannot deny the importance of editing photos because we believe that not all can capture a perfect picture. Of course, you cannot just replace the photo you captured because it is blurry. Most of the time, blurry photos can be magically transformed into a picture-perfect quality as long as you use the perfect photo editor like Photoshop. Hence, without further adieu, let us start the learning by reading the entire content about sharpening blurry images in Photoshop below.

- Part 1. Steps How to Sharpen Images in Photoshop
- Part 2. Much Easier Way to Sharpen Photos than Photoshop
- Part 3. FAQs about Sharpening Images on Photoshop
Part 1. Steps How to Sharpen Images in Photoshop
Photoshop is a powerful photo editing software developed by Adobe. The fact that you are here searching for instructions on how to use it to edit your photos means that you have ideas about it. Perhaps you also know that Photoshop offers two ways to sharpen photos: its High Pass filter and the Unsharp Mask filter. Both have different patterns and ways to meet your needs. Thus, see which of the two can help you more with your photos.
1. How to Sharpen a Blurry Image in Photoshop’s High Pass Filter
Photoshop’s High Pass filter is one of the most effective ways that you can use to sharpen a photo. Furthermore, this filter highlights the edges in the image after determining them exactly. On that note, this tool only works on edges, which means the parts of the photo that are not edges are kept as they are. Moreover, this filter produces an excellent result in photo sharpening through its combined blending mode while doing the process. Therefore, if you want to try this method on Photoshop, you may follow the steps given below.
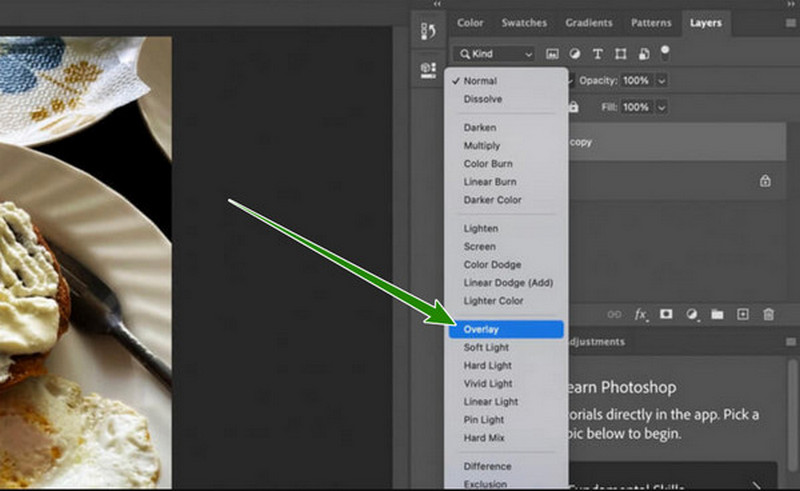
Launch your Photoshop on the computer, and upload the noisy photo file you need to sharpen. Now, you will need to duplicate the photo by right-clicking it and selecting the Duplicate Layer tab. Then, change the blend mode from Normal to Overlay.
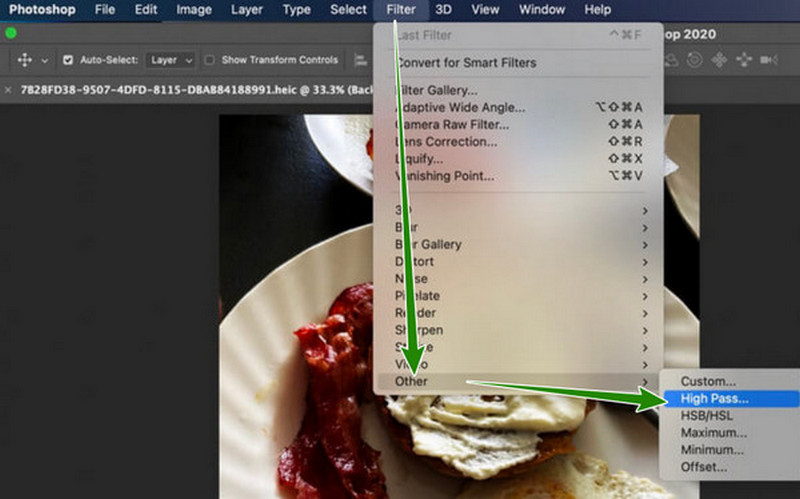
This time, apply the High Pass filter to the duplicated photo. To do so, click the Menu tab and choose the Filter tab. Then, navigate to the Other tab and choose the High Pass option.
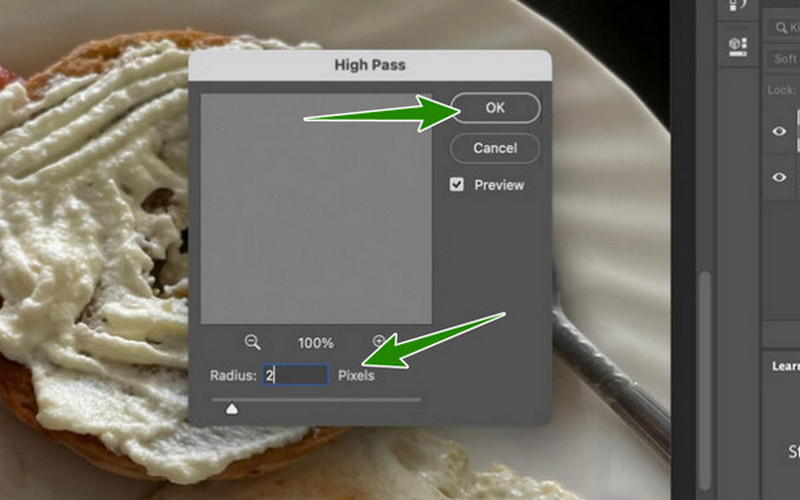
After that, in the popped-up window, adjust the values of the Radius section into 2 or 5 pixels and click the OK tab. Then, you can now save the file.
2. How to Brighten and Sharpen an Image in Photoshop’s Unsharp Mask
Another filter that will surely help you with your photos is the Unsharp Mask. This filter functions to sharpen the focus subject part of the photo. With this being said, you must realize that it doesn't work on the entire part of the photo, for its focus is on the subject in the photo. Thus, to see how this filter works, follow the steps we prepared below.
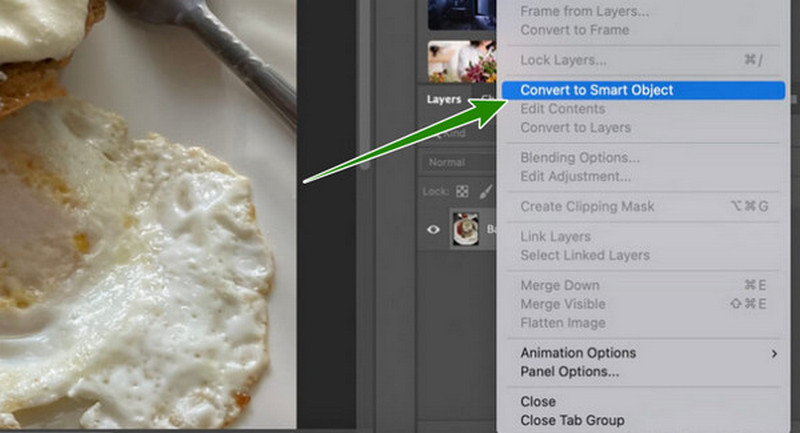
On the primary page of Photoshop, upload the photo to edit. Then, begin to convert the photo to a smart object. How? Hover over to the Layers panel, then click the Menu symbol that you see at the tail part of the panel. After clicking, options will prompt, and click the Convert to Smart Object selection.
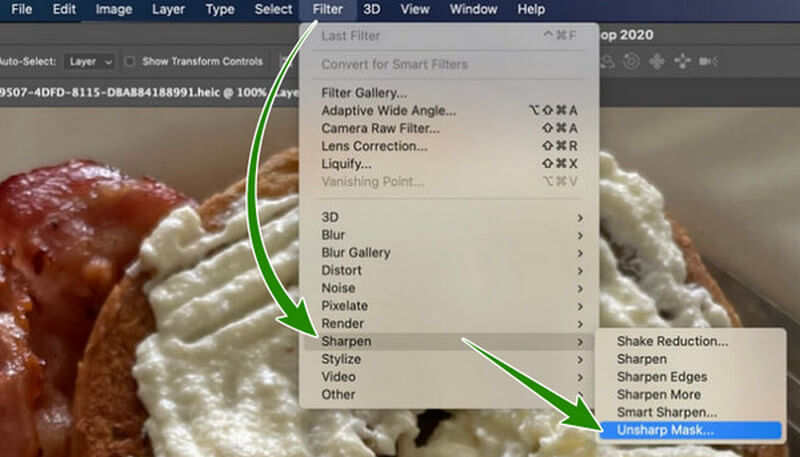
After that, it would be best if you will zoom in on the photo. Then, click the Menu tab and go for the Filter bar to see and select the Sharpen selection. Now, once the tiny window pops up, click the Unsharp Mask option.
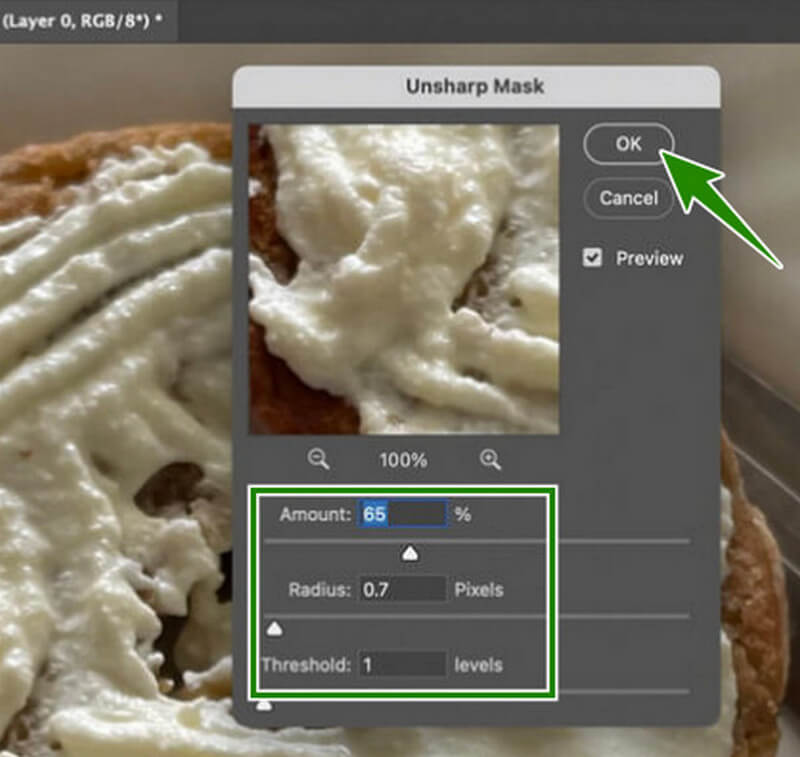
Now, on the Unsharp Mask window, set the value of the amount between 50-70 percent. Then, the radius must be between 0.5-0.7 pixels, for the threshold must be 2-20 levels. Subsequently, you can click the OK tab anytime you are ready. Click here to learn how to resize images in Photoshop.
Part 2. Much Easier Way to Sharpen Photos than Photoshop
If you want to use a much easier way to sharpen blurry images besides Photoshop, then we recommend this MindOnMap Free Image Upscaler Online. Yes, it is an online solution that will help you with your task in a smooth and hassle-free way. Furthermore, this amazing tool will only require three clicks to meet your newly sharpened photos. On top of that, you will be amazed at how this super easy procedure can bring a lovely output that looks like professionals working on it. In line with this, this online photo enhancer lets you enhance your images of up to 3000x3000px by the same procedure and lets you enlarge them to up to 8 times bigger. Not to mention, all the robustness and effectiveness of the tool are due to the AI technology that powers it.
If you now wonder how to brighten and sharpen an image in Photoshop's best alternative, then you must see the given steps below.
Using your desktop browser, visit the official website of MindOnMap and explore this upscaling image tool. Please note that you won’t need to install any software to access it.
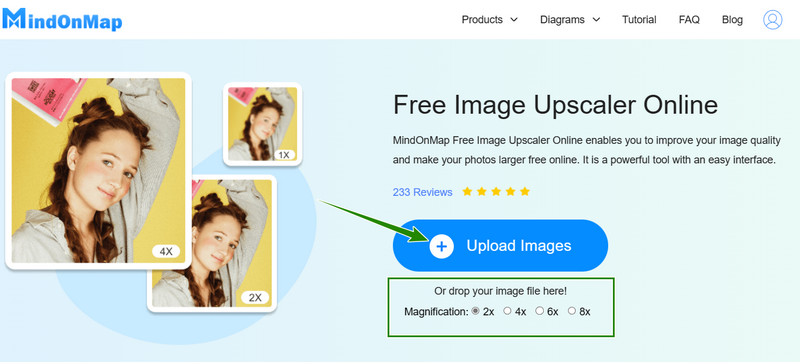
Now, once you get to its page, you can already select among the Magnification options if you plan to enlarge the photo. Then, hit the Upload Images button to load the file you need to sharpen.
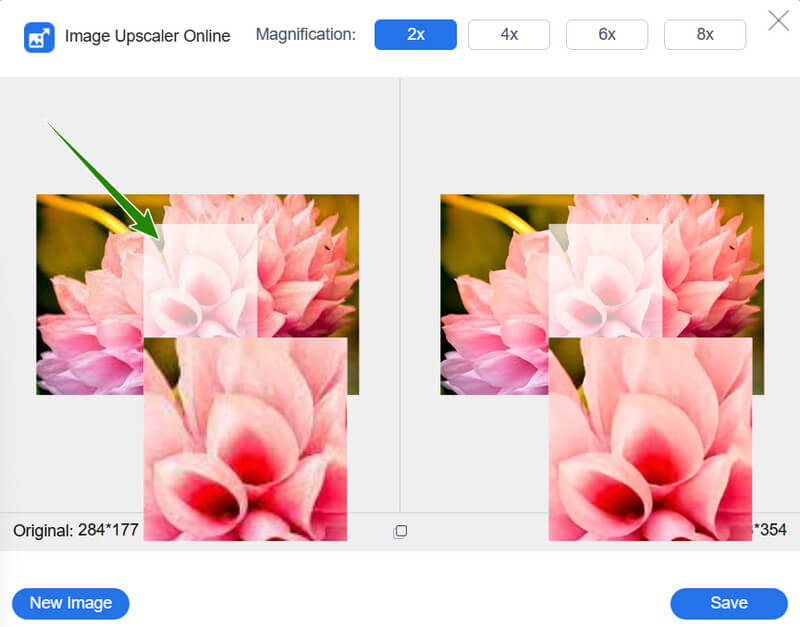
While the photo is uploaded, this tool will sharpen the image automatically. After a while, the main interface will preview your original photo together with the pre-output. This time, you can put your cursor on the original image to see their drastic comparison.
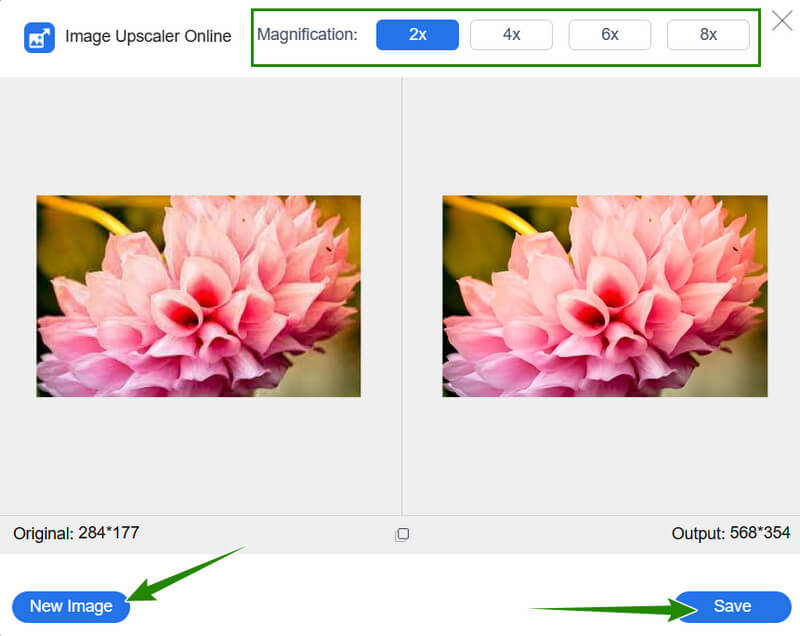
Please note that you are free to hit the New Image tab if you want to change the image file. Then, navigate to the Magnification if you want to enlarge the file. Subsequently, finish the process by hitting the Save button to save the image file to your computer or mobile device .
Part 3. FAQs about Sharpening Images on Photoshop
How to brighten and sharpen an image in Photoshop?
You should click the image menu to brighten the image while sharpening it in Photoshop. Then, click the adjustments tab on the next options and choose the brightness and contrast tab. After that, you can already set it to brighten the photo.
Does sharpening reduce the noise of the photo?
No. To sharpen a photo means to enhance its details and edges, and to denoise is to lessen the grain of the photo.
Is Photoshop free to sharpen photos?
No. You will need to purchase it to use it.
Conclusion
For your grainy photos, the key is to sharpen them. And to act like a professional, Photoshop is always present to use. Thus, if you badly need to know how to sharpen an image in Photoshop, this article is a good help. However, if you realize that purchasing this software is not worth it, you can rely on a free tool like MindOnMap Free Image Upscaler Online.