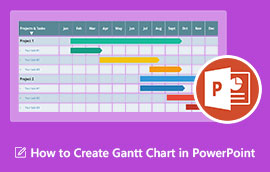
Ultimate Ways to Create A Decision Tree in PowerPoint with Best Alternatives
Do you wonder how to make your decisions more transparent and see the possible outcomes of each decision? Then you need to create your decision tree. This type of diagram is reliable for making your decisions great. With the help of a decision tree, you can insert your decisions with the desirable and undesirable outcomes. This way, you will get an idea of how to decide well. In that case, this guidepost might be helpful for you. We will give you the best way to make a decision tree in PowerPoint. Also, aside from this offline program, you will discover more effective decision tree makers you can utilize. So, read this article and make your decisions more organized in the future.

- Part 1. Best Alternative to PowerPoint in Creating A Decision Tree
- Part 2. How to Make A Decision Tree in PowerPoint
- Part 3. FAQs about Making A Decision Tree
Part 1. Best Alternative to PowerPoint in Creating A Decision Tree
Creating a decision tree is challenging when you don’t know what tools to use. In that case, use MindOnMap. Using this online tool makes it simpler to design a decision tree. Additionally, the tool offers a user-friendly interface. Both professionals and beginners can utilize them efficiently, thanks to their straightforward layouts. MindOnMap also offers decision tree templates, so you can choose what design you prefer and start adding the text inside the shapes. But if you want to create and design your decision tree, you can do so.
The online tool can provide you with various elements you can use for creating your diagram. It includes shapes, connecting lines, arrows, text, styles, and more. You can also modify the color of each shape if you want. The tool can also offer an auto-saving process. While creating a decision tree, the tool can automatically save your diagram every second. This way, you don’t need to worry if you forget to save your diagram. Moreover, after making your decision tree, you can save it in a different format. You can save the decision tree in PDF, PNG, JPG, SVG, and more formats. In addition, you can also share your work with other people. All you have to do is to share the link. You can also use MindOnMap on all browsers, so don’t worry about its accessibility.
Secure Download
Secure Download
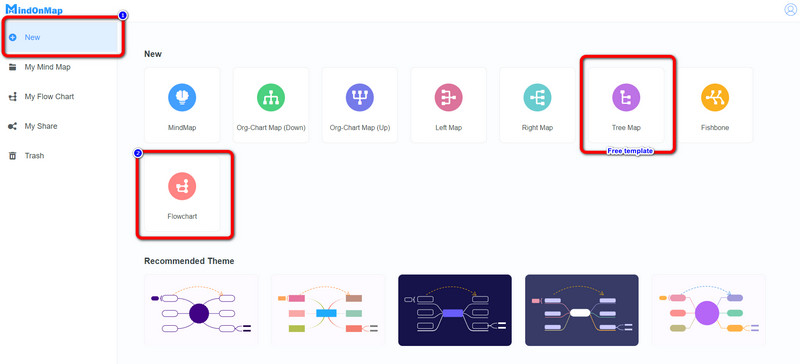
Launch your browser on your computer and visit the main website of MindOnMap. Then, you need to create your MindOnMap account. You can connect your Gmail account to this tool. Click the Create Your Mind Map option on the center webpage.

After that, navigate to the New option on the left screen. You can use the free templates or create your decision tree manually. To understand more about making a decision tree, let’s create your chart by clicking the Flowchart option.
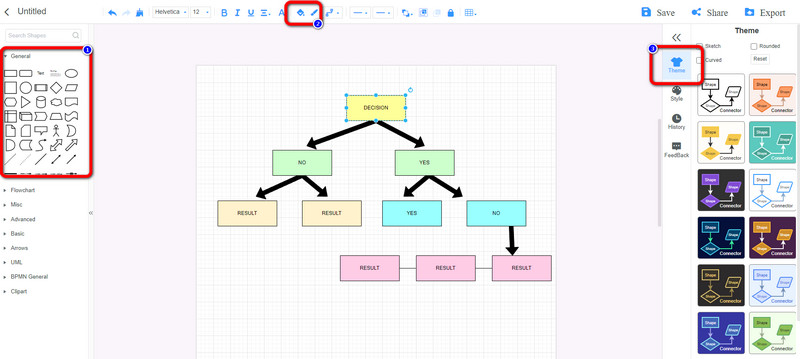
You can start creating your diagram by adding shapes and text on the screen in this part. To add the shapes, go to the left part of the interface and see the General option. There are also Themes on the right interface. You can also insert arrows for connecting shapes. Then, double-click the shapes to insert text inside them. Go to the Fill color option on the upper interface to change the color of the shapes.
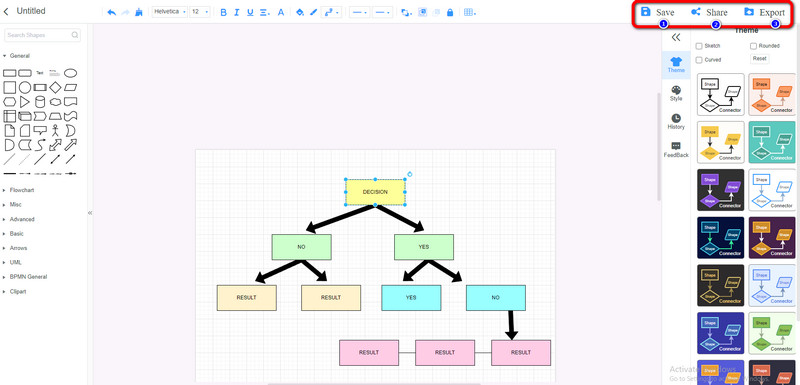
When you are done creating your decision tree, click the Save option to keep your decision tree on your MidnOnMap account. Click the Share button if you want to share the link of your work with another user. Also, you can save your decision tree in various formats like PDF, SVG, DOC, JPG, and more by clicking the Export button .
Part 2. How to Make A Decision Tree in PowerPoint
If you prefer an online way to make a decision tree, use Microsoft PowerPoint. This offline program can provide all the elements necessary to create a decision tree. You can use various shapes and text with designs, connecting lines, and more. You can also use simple decision tree templates using the Illustration section. In addition, if you desire to create a colorful shape for your decision tree, then it is possible. Microsoft PowerPoint also allows you to change the color of the shapes with the help of the Fill color option. Moreover, since the program provides everything you need, creating a decision tree will be simple. This way, advanced users and beginners can use PowerPoint to create a decision tree. However, you can’t enjoy its full features when using the free version. Also, some of the layouts become confusing because of some complicated options. You need to purchase the program to enjoy its full capabilities. So if you are a beginner, even if it has a simple procedure, ensure that you know the function of each element in creating your diagram. Follow the instructions below to learn the methods on how to do a decision tree in PowerPoint.
Launch Microsoft PowerPoint after installing it on your computer. After that, click the Blank Presentation to start creating your Decision tree.
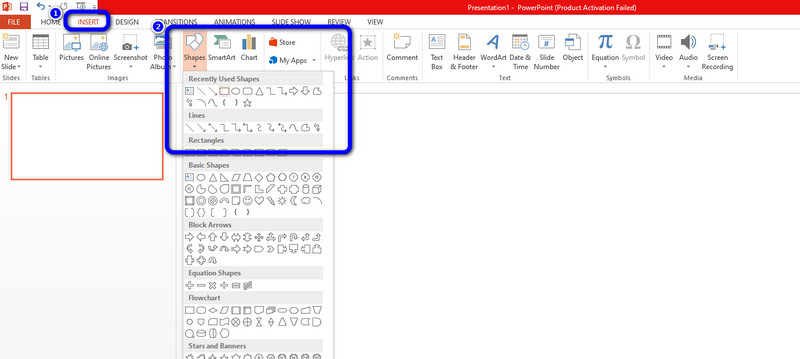
Navigate to the Insert tab and select Shapes. You can use Rectangles, Circles shapes, and lines on your decision tree.
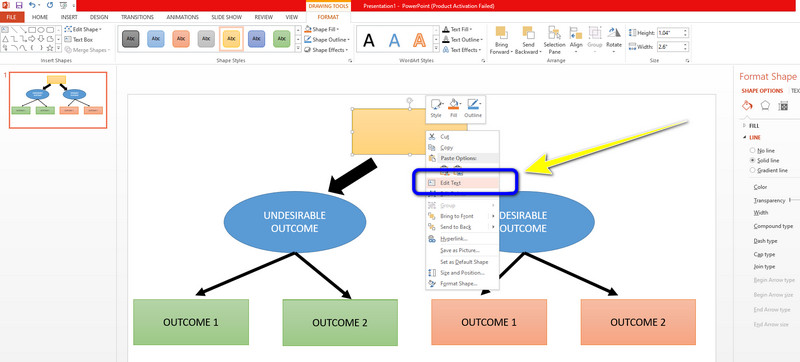
To add text inside the shape, right-click the shape and select the Add text option. Then, if you want to change the color of the shapes, navigate to the Format tab and click the Shape Fill option to choose your desired color.
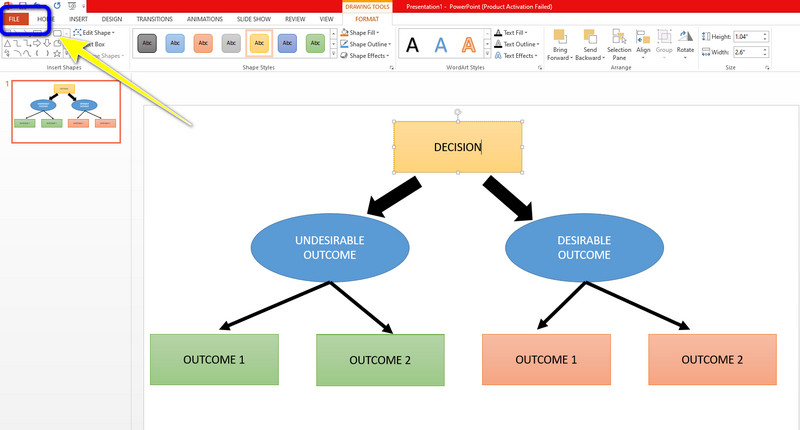
When you are done drawing your decision tree on PowerPoint, save it by clicking the File > Save as option. Then, you can save your final output in various formats. It includes JPG, PNG, PDF, XPS documents, and more.
Part 3. FAQs about Making A Decision Tree
1. What does a decision tree provide?
Decision trees are an efficient way to make decisions because they: Spell out the issue so that all potential solutions may be tested. Permit us to examine any potential effects of a choice thoroughly. Establish a framework for quantifying outcome values and likelihoods of success. This way, you will get an idea of the possible outcomes you might get.
2. Is there a decision tree template in PowerPoint?
You can use the SmartArt graphic as a template for the decision tree. If you want to create a decision tree, navigate to the Insert tab and select the SmartArt graphic option. After that, select the Hierarchy option. Then, you will see the templates you can use in creating your decision tree.
3. What are the limitations of the decision tree?
One of their drawbacks is that decision trees are significantly more unstable than other decision predictors. A tiny change in the data can significantly impact the decision tree's structure, resulting in a result that differs from what people would typically see.
Conclusion
That’s all about how to make a decision tree in PowerPoint and MindOnMap. Now you can create a decision tree without being confused about what to do. However, if you prefer an online way to create a decision tree, use MindOnMap. This online tool is accessible in every browser.