Complete Guidelines for Creating a Fishbone Diagram in PowerPoint
A fishbone diagram is one of the most famous illustrations that depict a cause-and-effect analysis. Furthermore, it is one of those diagrams that everyone is looking forward to, especially in analyzing why a specific circumstance happened. It is a simple and effective way to solve a problem in a situation. On the other hand, PowerPoint, one of the office suites of Microsoft, can be a suitable means of creating diagrams. As a matter of fact, it has been one of the most used methods lately. However, suppose you have already tried using PowerPoint. In that case, you must agree on how frustrating it is, what more, when making a fishbone diagram in PowerPoint. For this reason, we have created a post to help you with the process, and of course, with a more straightforward solution that you can have. All of these you will learn as you read the content below.

- Part 1. How to Create a Fishbone Diagram with the Best Alternative to PowerPoint
- Part 2. How to Make a Fishbone Diagram on PowerPoint
- Part 3. FAQs on How to Make a Fishbone Diagram in PowerPoint
Part 1. How to Create a Fishbone Diagram with the best Alternative to PowerPoint
As mentioned before, PowerPoint is somehow frustrating to use. With this being said, you must know about MindOnMap, the much easier way to create a fishbone diagram than using PowerPoint. MindOnMap is the best web mind-mapping tool that helps you make creative and persuasive diagrams, flowcharts, and other illustrating maps for free. Furthermore, it has a simple interface that works in an easy and quick procedure on your fishbone diagram project. Regarding its stencils, you will be surprised at its broad options, which provide you with numerous selections of themes, icons, shapes, styles, structures, outlines, and many more.
Another reason that will compel you to use it is that it won’t require you to pay any dime to enjoy it. MindOnMap is an entirely free tool that will let you draw a fishbone diagram unlimitedly, unlike PowerPoint. Hence, here are the guidelines you can follow if you want to use the tool.
How to Make a Fishbone Diagram in MindOnMap
Visit the Website
Firstly, on your web browser, please enter the link of MindOnMap to visit its official page. Upon arriving, click the Create Online or the Login buttons on the page or click the Free Download button below. It will let you sign-up as a first-time user. You must use your email address to sign in, and then you may begin the work.
Secure Download
Secure Download

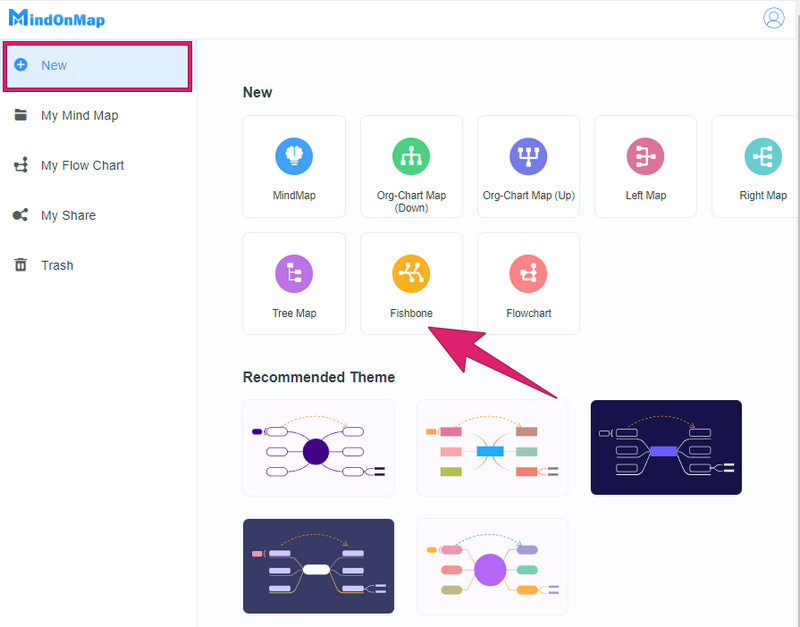
Choose the Fishbone Template
Once you have accessed the main page of the free program, go to the New option. Then, select the Fishbone option among the templates and themes available on the other side of the page. Now, proceed to the following steps on how to draw a fishbone diagram in PowerPoint’s best alternative.
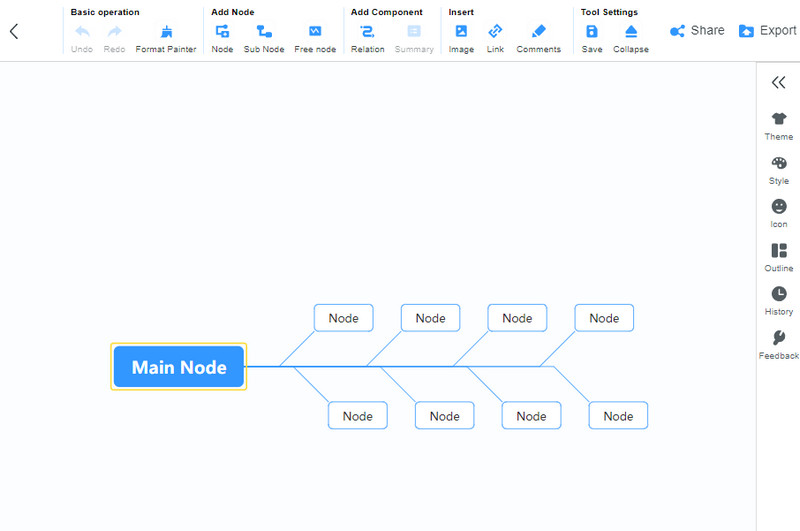
Start Making the Fishbone Diagram
After choosing the fishbone template, you will access the main canvas. It is where you begin creating the diagram. On the canvas, you will initially see one node as a start. You may expand it by pressing the Enter key on your keyboard simultaneously until you reach the fishbone design you need. While expanding, you can begin labeling the diagram with the necessary information.
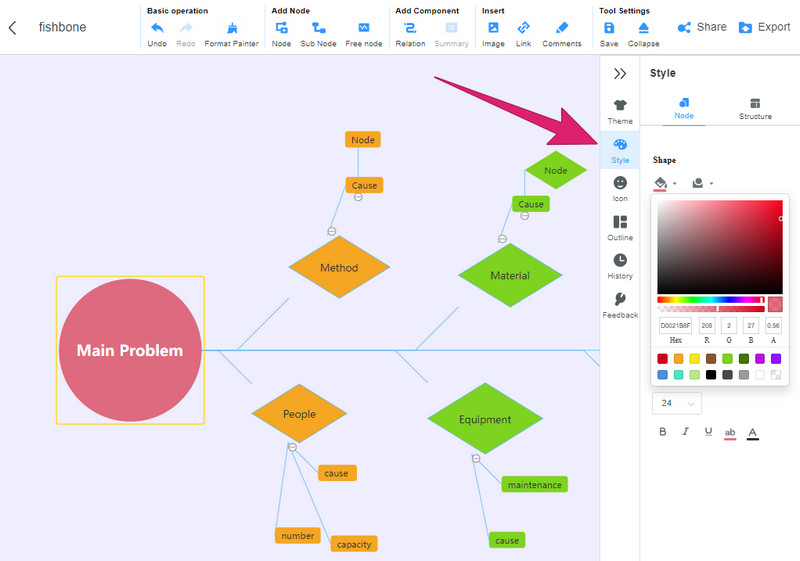
Design the Fishbone
After that, make time to design your fishbone diagram based on preference. To design, access the Menu stencils on the right side, then access the Style and the Shapes to modify the shapes of your diagram. Then, access the Color Fill to customize the color of your nodes.
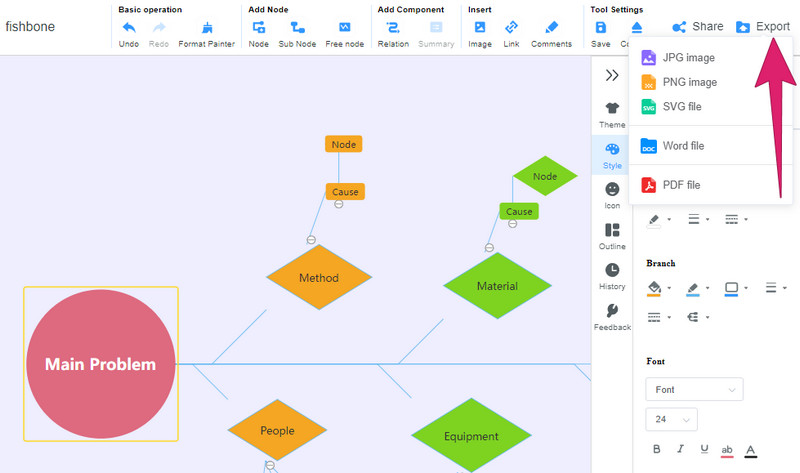
Export the Fishbone Diagram
Finally, after finishing the diagram, you can press the CTRL+S keys on your keyboard to save it in the library. Thus, if you want to save the diagram from the fishbone diagram maker to your device, hit the Export button, then choose a format for your output.
Note: You can also use MindOnMap’s Flowchart Maker for this task. Upon reaching the tool's main page, click the My Flow Chart option under the New tab. Then, you can freely create your diagram by adding shapes.
Part 2. How to Make a Fishbone Diagram on PowerPoint
Let us now learn how to make a fishbone diagram with PowerPoint as your primary purpose for reading this article. But before that, you must know further information about this suite of Microsoft. PowerPoint is a tool for a presentation that comes with many transitions, slide shows, animations, designs, and illustrations. It is by the pile of illustrations that you can use in creating your fishbone diagram. Therefore, let’s see how you can use this function to create an exemplary fishbone diagram for you to follow.
Access the Shapes in PowerPoint
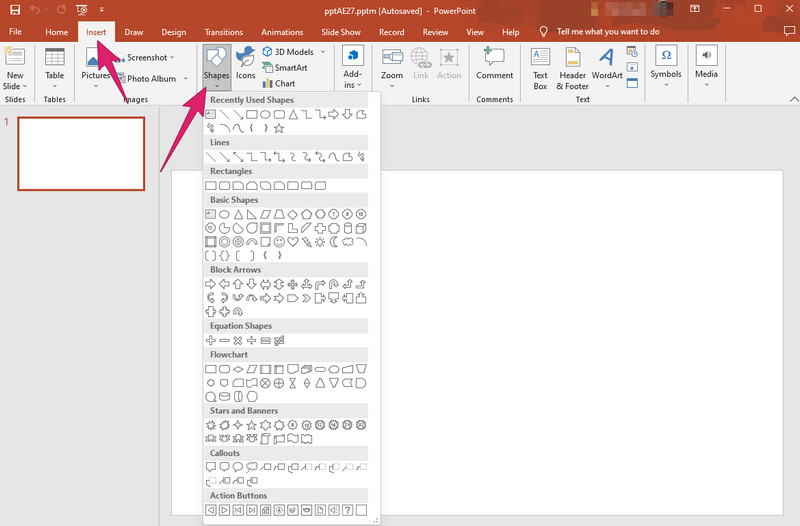
Open PowerPoint installed on your desktop. Now, you need to take note that the SmartArt function doesn’t contain a free fishbone diagram template. Therefore, you will need to use the Shapes option when you hit the Insert menu.
Start Your Fishbone Diagram
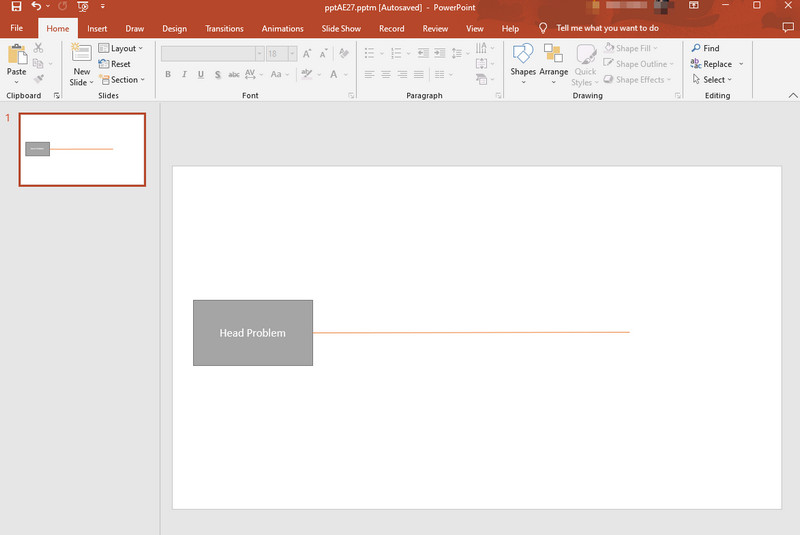
This is how to draw a fishbone diagram on PowerPoint. You have to start by putting a head node. From the Shapes, select a rectangle and add it to your blank slide. After that, you can draw a horizontal line connected to the head node. This line will be your diagram’s spine.
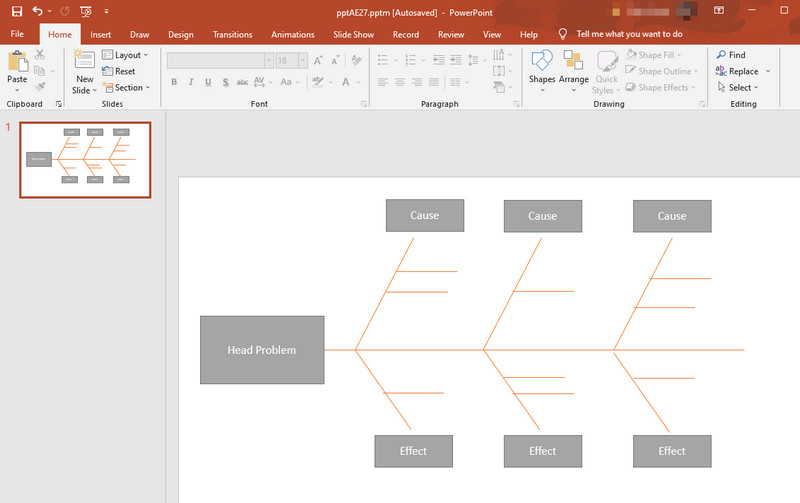
Expand and Label the Diagram
After that, expand your diagram by adding more elements that will make your diagram whole. Also, this time you can already label your fishbone diagram and design it according to your preference.
Save Your Diagram
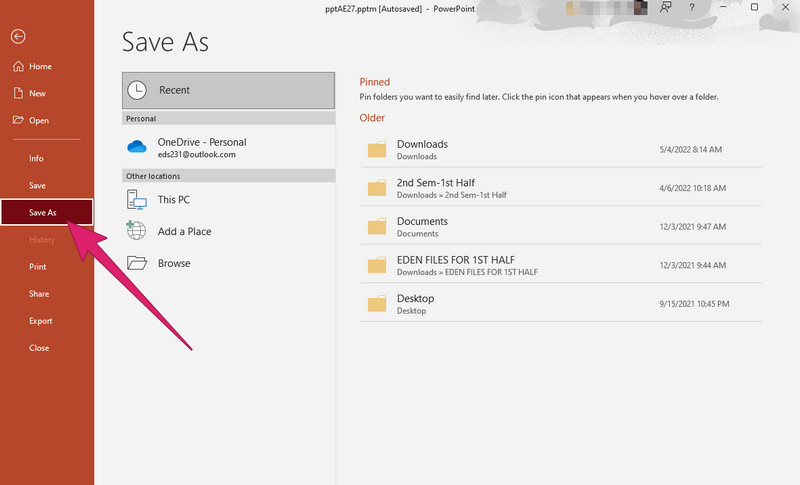
After finishing your fishbone diagram, you can now save it. To do so, click the File menu, select the Save As tab, and choose the format you want.
Part 3. FAQs on How to Make a Fishbone Diagram in PowerPoint
Can I share the fishbone diagram on PowerPoint?
Yes. PowerPoint comes with a share function. It allows you to share your fishbone diagram with your friends via email or save it to a cloud that your friends can access.
How to insert a fishbone diagram in PowerPoint?
Unfortunately, inserting a fishbone diagram in PowerPoint is not possible. This is because most of the templates you got online are workable on Word. PowerPoint only supports importing files in an image format.
In what format does PowerPoint export?
PowerPoint lets you export your fishbone diagram in presentation, PNG, JPEG, PDF, GIF, MPEG-4, and TIFF formats.
Conclusion
There you have it, the complete guidelines on making a fishbone diagram in PowerPoint. On the other hand, if you think this method does not suit your preferences, then cling to the best alternative we have here for you. In MindOnMap, you will surely achieve your fishbone diagram goal because it has many more options and a much easier way to navigate.