How to Resize An Image with Effective Tools and Detailed Steps
There are thousands of ways to modify a photo’s size, but not all effectively maintain quality. As this kind of issue travels and gets on the nerves of many photo editors, the search for efficient photo editing tools is escalating. But didn’t you know that there are effective ways that are lying on your desktop already? Yes, you may have effective programs on your computer, but you do not know they can help you competently with this task. This is why we have decided to write this article, to cut your long search and give you the best solutions to resize an image in the palm of your hand. Given this point, we are excited to present an online tool along with Microsoft Word, PowerPoint, and Illustrator to be the stars of this post. Furthermore, you will be amazed at how flexible these tools are, for they also come with other functions that will undoubtedly be very beneficial to you. Therefore, let us not delay this learning any longer, and let’s excitingly run it by reading the entire content below.

- Part 1. How to Resize a Photo without Damaging Quality Online
- Part 2. How to Resize a Picture in Word
- Part 3. Detailed Steps in Resizing a Photo Using PowerPoint
- Part 4. Guidelines on How to Resize an Image in Illustrator
- Part 5. FAQs about Resizing Photos
Part 1. How to Resize a Photo without Damaging Quality Online
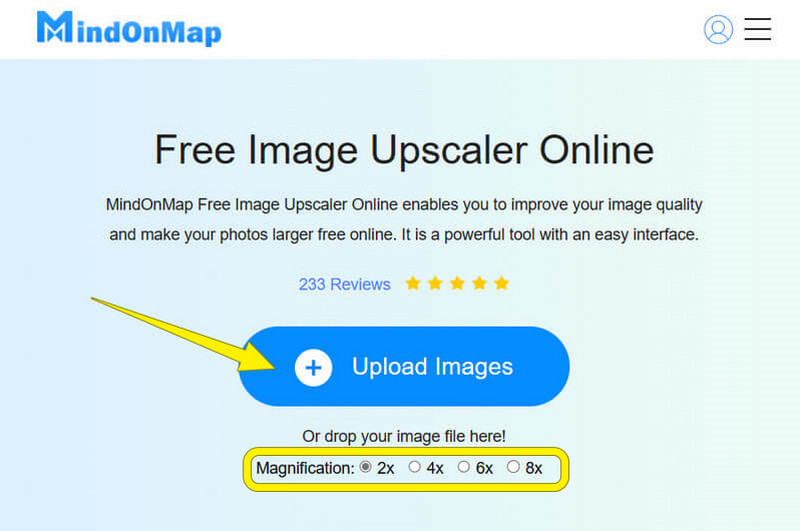
If you want to resize your image without losing quality, you can try the best online tool we highly recommend, MindOnMap Free Image Upscaler Online. This web-based tool is an amazing solution that comes with a very effective procedure that produces a high-quality resized photo. With its very simple interface and smooth procedure assisting you quickly with your task, you will have the certainty of doing all your assigned tasks on time with the assurance of their quality. What makes it incredible is that you don’t need to be a professional to succeed in this process because it is a tool that is quite friendly for beginners. Meanwhile, you will be amazed that even though it sizes up your photos up to 8 times from their original size, the quality and resolution are still high. This is all due to the advanced Artificial Intelligence technology that this tool uses, which makes the magnification and enhancement process highly efficient.
What’s more? This MindOnMap Free Upscaler Online has been providing a free-charge service to change picture sizes in an ad-free interface. What’s more amazing is that this free service produces watermark-free outputs and has unlimited boundaries on the number of files and their sizes. All of them you can have in an effortless and accessible way online! Thus, here is the step that you will need to follow when resizing the photos losslessly online.
How to Use MindOnMap Free Upscaler Online
Visit the Website
Visit the main website of MindOnMap Free Upscaler Online using your browser and immediately pick a Magnification you need to acquire for your photo. After picking one, hit the Upload Images button that will enable you to import the photo file and proceed to change the picture size.
Preview Your Photo
When the process of uploading has finished, this amazing tool will bring you its main interface. Here, you will initially notice the Preview section at the center. You can also spot the difference between the two photos since this tool has already enhanced the file during the uploading process. Now, as you see, the Magnification option is still present. Therefore, you can still modify and tick the size according to your need.
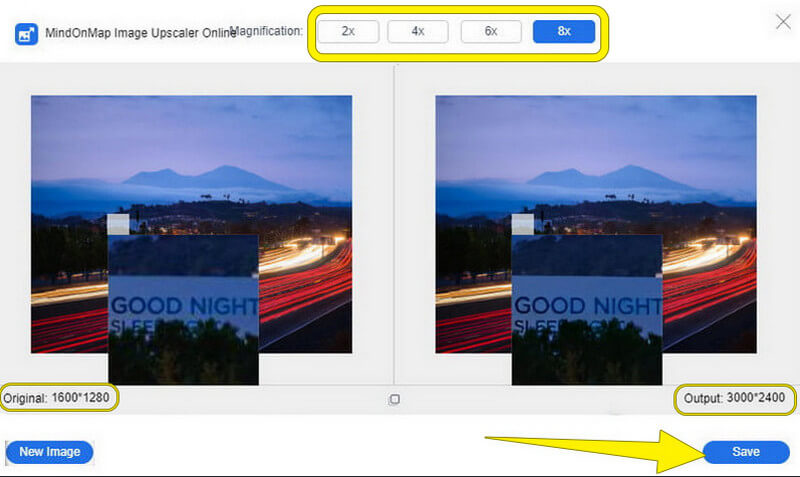
Save the Resized Image
If just in case you magnify your photo, please don’t fail to re-check the resolution size located under the Preview option. Then, when you think it’s perfect, click the Save tab. The tool automatically saves the file to your device by clicking this button.
Part 2. How to Resize a Picture in Word
Moving forward is using one of the most helpful suits of Microsoft, which is Word. This software is a tool that mainly processes texts. But little did we know that this, too, can be a great and effective assistant in changing the size of a photo. You read it right, Microsoft Word can help you change the picture size by effectively raising and reducing the photo dimensions. As a matter of fact, it also lets you add and subtract the width and height of the photo manually according to your preferences. In addition, there is also a cropping tool in Word that you can use to crop the photo into different shapes, where you can also resize the photo by just dragging and clicking it. Amazingly, this program allows you to use its numerous effects and filters that are beneficial for your photos. Along with these are the extra tools such as the light screen, pencil grayscale, pencil sketch, photocopy, and many more.
Via Setting the Height and Width
Launch Microsoft Word using your desktop and open a blank document. Upon opening a new blank page, you can upload your photo by clicking the Insert menu from the ribbon above. Choose the Pictures option and upload your photo from your device.
Once the photo is uploaded, click the Picture Format button among the ribbons above. Then, many options will show up, but you need to fix your eyes on the Size section at the tail part. On this Size menu, click the arrow buttons of the Width and Height for you to resize the image.
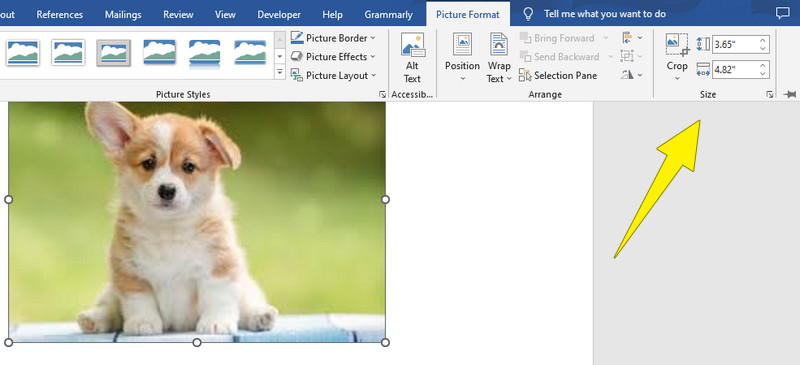
Alternatively, by launching the Layout menu, you may adjust the photo size with the same dimensions. This menu is located at the bottom right corner of the Size section. A new window will appear when clicked, enabling you to set the dimensions such as the Width, Height, Rotation , and Scale. All the changes you’ve made here will only apply when you hit the OK button.
Via Click and Drag Procedure
With the same drill, upon launching the Microsoft Word application on your desktop, upload the picture you wish to rescale. Please follow the same procedure given above for the importation process.
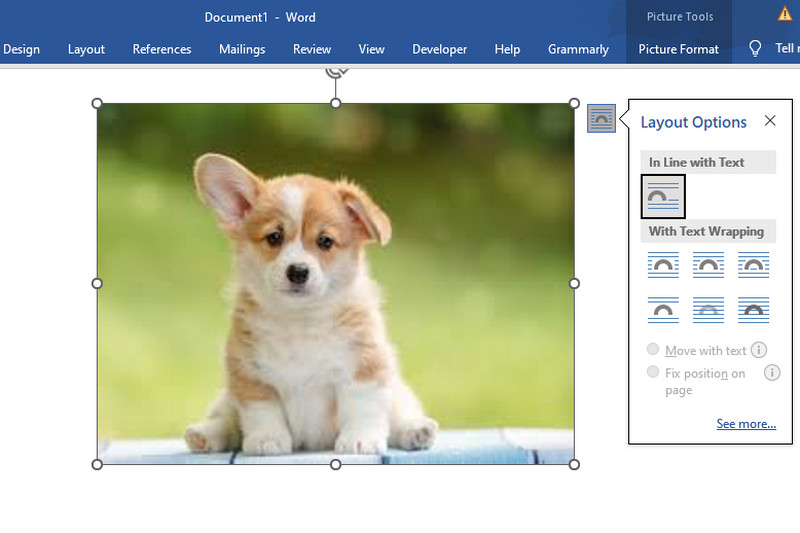
Now, to change the picture size, click the photo to see the Sizing Handle shown on the edges. As you notice in the picture, all of its sides contain a resizer, and you can use any of them to rescale your photo.
Click a side you want to resize, and drag the image until you get the preferred size for the image.
Part 3. Detailed Steps in Resizing a Photo Using PowerPoint
Another Microsoft product that is capable of resizing an image is PowerPoint. Yes, this software for presentation can help you shrink or enlarge your photos, the same as Microsoft Word capabilities. It is better because, unlike Word, you can edit your image and separate the participant from the background with PowerPoint. Yes, you have read it right. This tool can be a good tool for removing the photo backgrounds.
On top of that, like the other suites, PowerPoint has a color corrector that will allow you to apply significant effects to your photos. However, unlike Microsoft Word, PowerPoint has more challenging navigation. Thus, if you like how this software runs, and want to know how to resize a picture in PowerPoint, then see the steps below.
Initially, launch PowerPoint on your computer. Then, before bringing your photo to the slide, you must clear the slide first to make it blank. To clear, right-click on the edges of the figures and click the Cut option.
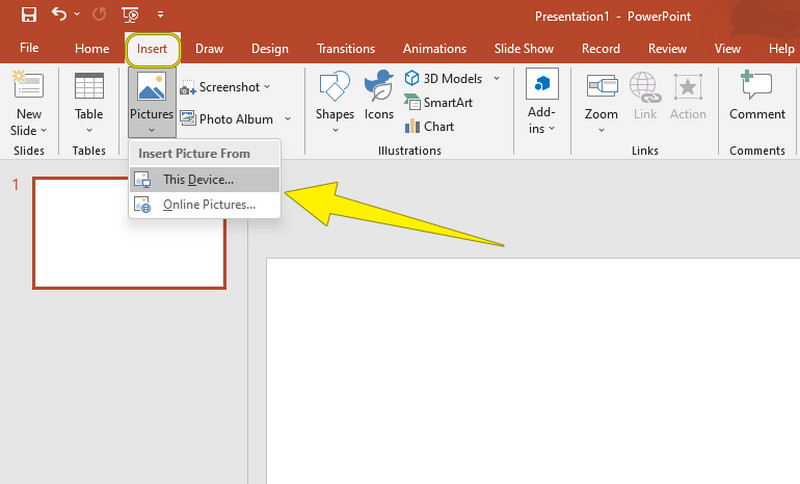
Once the slide is blank, go to the Insert menu, and click the Pictures selection among the options. After that, choose the option you want to upload your photos. As you see, the software allows you to import a photo online aside from your photos from a local folder.
When the photo is already on the page, adjust the size by its Sizing Handles around it. Then, once you get your desired size, save the photo.
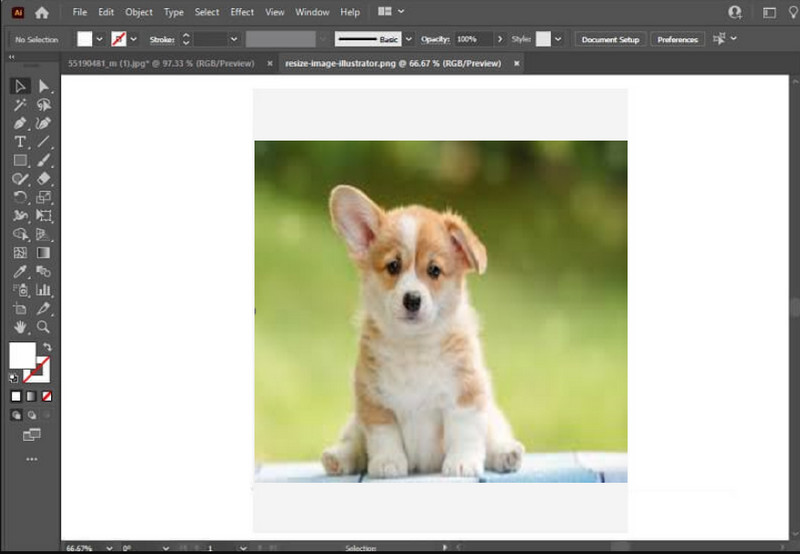
Part 4. Guidelines on How to Resize an Image in Illustrator
Finally, here is this Illustrator, a software that Adobe owns. We have included this program to answer the question we received about how this program works on resizing photos. This way, there will be no excuse for you to say Adobe Illustrator won’t let me resize my photos.
First, ensure that your desktop has this tool and if it does, launch it. Now, upload your photo by hitting the File menu and selecting the Open button.
Now, use the Selection Tool. After selecting, the resizing bars on the photo's edges will appear. You can now begin adjusting the bars while pressing and holding the Shift key from your keyboard.
Finally, right-click the photo when you finish adjusting it. And from the options given, pick an Export option.
Further Reading
Part 5. FAQs about Resizing Photos
Can I resize BMP without losing quality?
Many are wondering if they can resize BMP without affecting the quality. And once and for all, to answer this question, it is a yes. However, it will only be possible if you only use the right photo resizer because if not, it will just leave your BMP to appear distorted.
Is using an online tool a safe way to resize my picture?
Yes. Many online tools are safe to use. However, some will still ask you about your personal information. Just beware of those tools.
Does resizing the picture affect its quality?
Yes, especially when enlarging the photo. It is because photo enlargement may or may not improve the photo quality, and most of the time, photos get pixelated.
Conclusion
There are many ways to resize an image, but few are effective. Hence, before you use the wrong tool, we have presented the efficient tools you often see on your desktop. In addition, we added the most efficient online tool you can efficiently utilize with your computer or even on your mobile phone: MindOnMap Free Image Upscaler Online.