Best Ways on How to Create a Concept Map in Microsoft Word: Two Easy Ways
Are you a student who needs to organize their thoughts, especially regarding your classroom lessons? It can be an educator who needs to gather concepts for Publications stuff? Even a businessman who needs to conceive a plan for its next product presentation? Whatever profession we have, we all know a fantastic insight can make sense if not adequately conceptualized. That is why utilizing a tool that can help us create a concept map is an important thing we need to do. That is why in this post, we want to help you organize our concepts for our future endeavors. We will introduce you to a desktop and an online software you can use.
Furthermore, we will provide information about the mapping tools with super detailed steps. Let us now alleviate our struggle to create a Word concept map through this simple yet practical guide for you. Kindly look at every detail and step to prevent complications in creating a concept map in Word.

- Part 1. What is a Concept Map?
- Part 2. How to Make a Concept Map using Word
- Part 3. How to Make a Concept Map Online
- Part 4. FAQs about Making a Concept Map in Word
Part 1. What is a Concept Map?
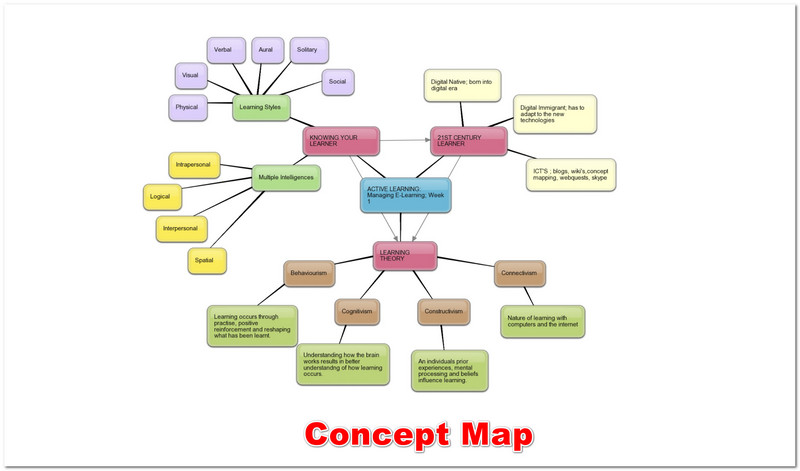
Concept maps are famous for graphical representations of data, and these graphics include charts, graphic organizers, tables, flowcharts, Venn Diagrams, timelines, T-chart, and more pictures. In addition, Concept maps are especially beneficial for different users like students who learn easily using visuals, but still, they can benefit any learner. Also, Concept maps are an effective study tactic because they help us see the bigger picture by beginning with higher-level concepts. They allow you to comprehend information based on meaningful connections.In other to understanding the big picture makes details more essential and easier to remember, which is the purpose of a Concept Map.
Furthermore, Concept maps are beneficial in classes or writing content with visual elements, or when it is critical to see and understand relationships between things. It is also a great map that we can use in comparing, contrasting, and analyzing data information.
Part 2. How to Make a Concept Map using Word
Microsoft Word
Microsoft Word is one of the flexible software we can use to organize our thoughts and insights. It is also a fantastic tool for creating different kinds of documents. If we are talking about its features, this article might not be enough to discuss all of them. But, one thing is for sure: Microsoft Word is also an excellent tool in creating a Concept map. It can offer enormous tools to make our maps more attractive and comprehensive to sight. Not only that, as we all know that Microsoft can give us the most professional output in any aspect. For that, we are glad to share with you the simple steps in making a concept map in Word Document. Please have a look at the details and steps below.
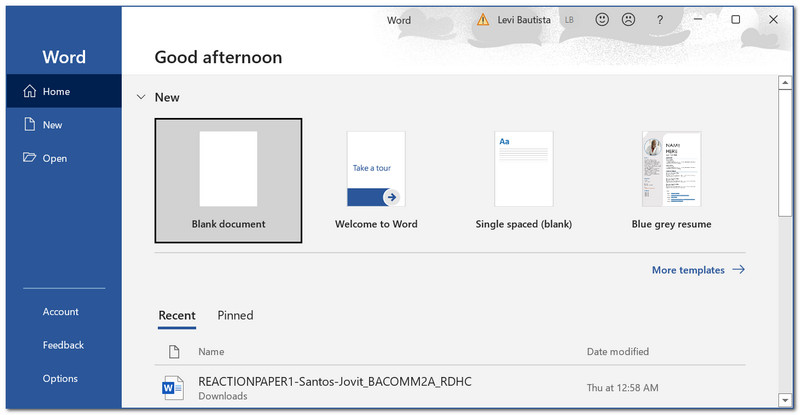
Open Microsoft Word on your computer.
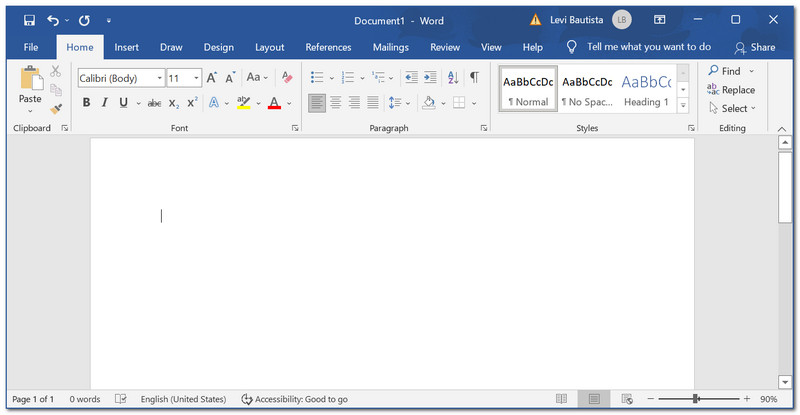
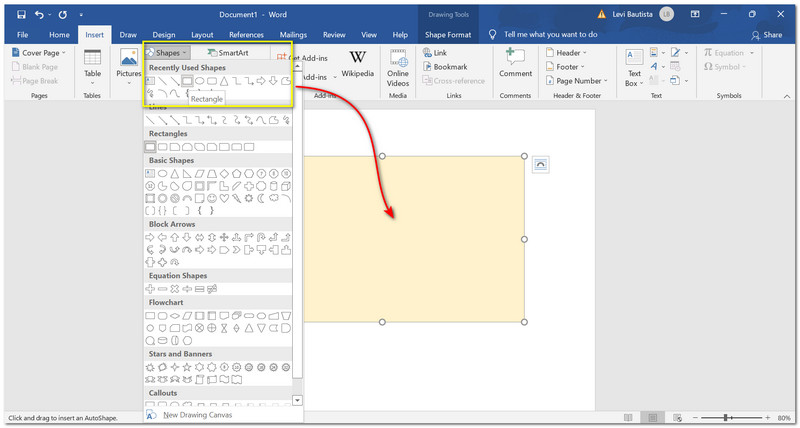
On the top corner of the concept map maker, locate the Insert tab. Under it, go to the Shape and click New Drawing Canvas at the lower portion of the drop list.

You can now see a Canva on your Document. Click the Paint icon to add some color to your canvas.
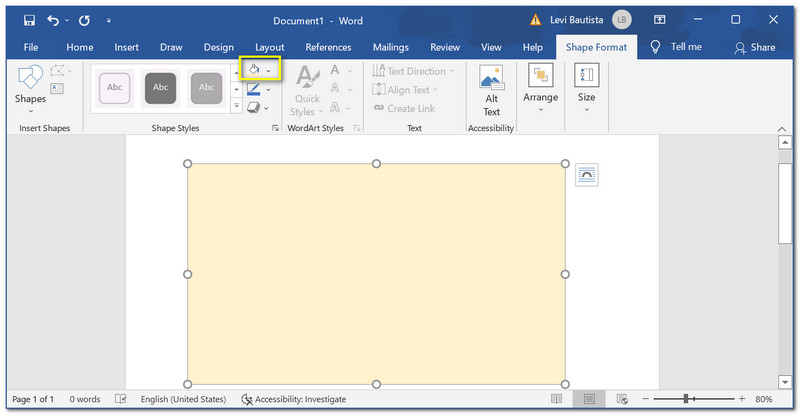
Click the Insert again and add some Shapes you want to add to your Concept Map. Click the Shape and hold it until you can drop it on the Document. You may adjust its size and modify the color depending on your preference.
Add more shapes you want and arrange them per your Concept. We can add Text to make the concept map comprehensive as we put more detail.
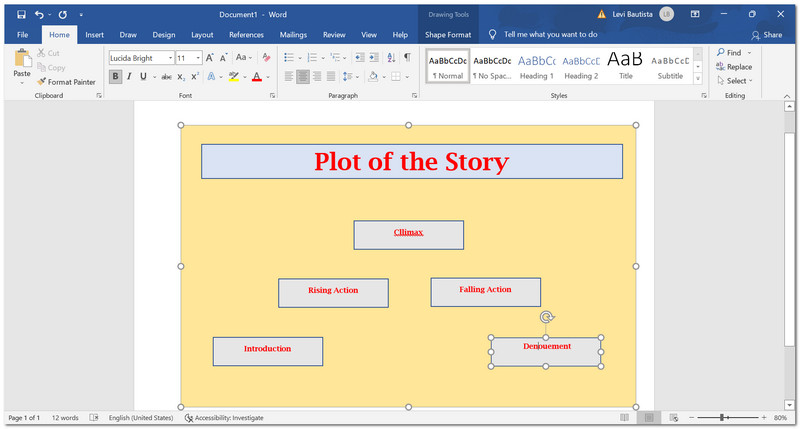
It is also essential to add some Arrows to make our Concept Map more concise and easy to understand, especially its flow. Go to the Shapes and drag and drop arrows between the shapes on the documents.
Finalize your Concept Map before saving it. You may do some revisions and proofreads to make the Concept Map more concise.
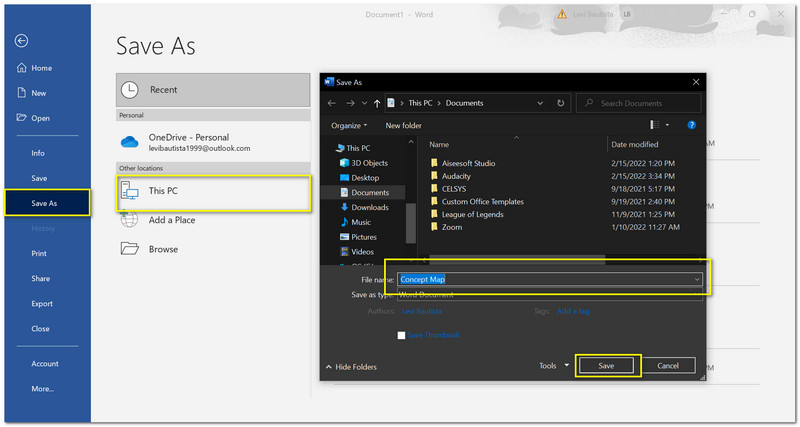
Then, click the File tab at the top of the software. Under it, locate Save As. Click This PC, then save the file on your preferred files.
Then, click the File tab at the top of the software. Under it locate Save As. Click This PC then save the file on your Document.
Now, click the Save button.
Part 3. How to Make a Concept Map Online
MindOnMap
The following tool is an excellent medium in creating a Concept Map using an online process. MindOnMap is an online organizing tool that we can access for free. That means creating our maps is now possible through this software. It offers many features that are beneficial for all of us. Some of the features it provides are ready-to-use templates. That process can bring ease with our grinding moments. In addition, it has professional Sub Nodes features for making our Concept maps attention grabber and comprehensive. There we see and understand more of the features. Here is a simple tutorial in creating a Concept Map using the online tool of MindOnMap.
Secure Download
Secure Download
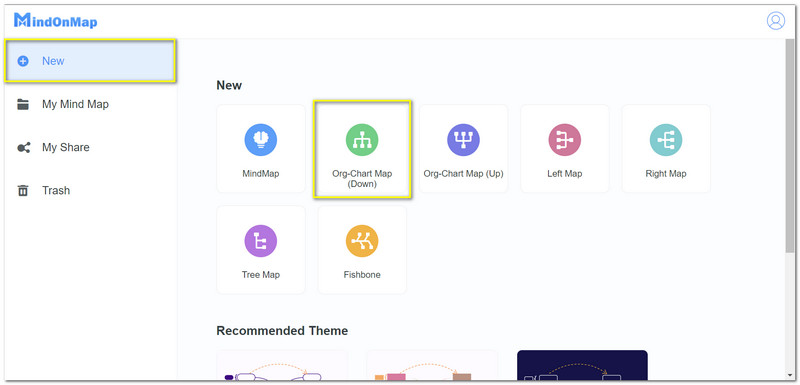
Go to the official website of MindOnMap. Click the Create Your Mind Map at the middle part of the website.

From the new tab, locate the New the click the kind of map you want to create.
Then, add the name of your file. At the top of the website tab.
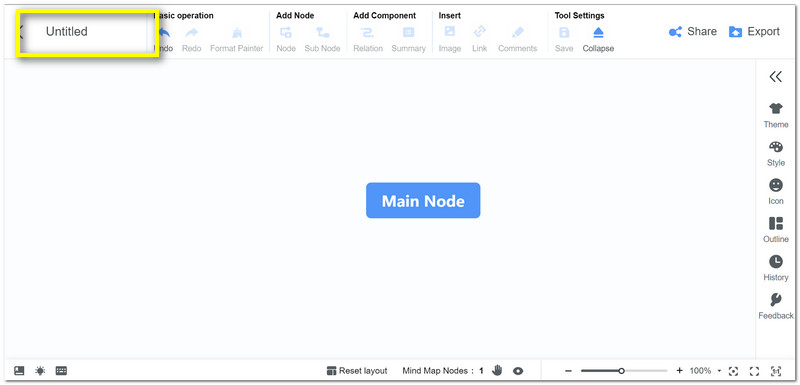
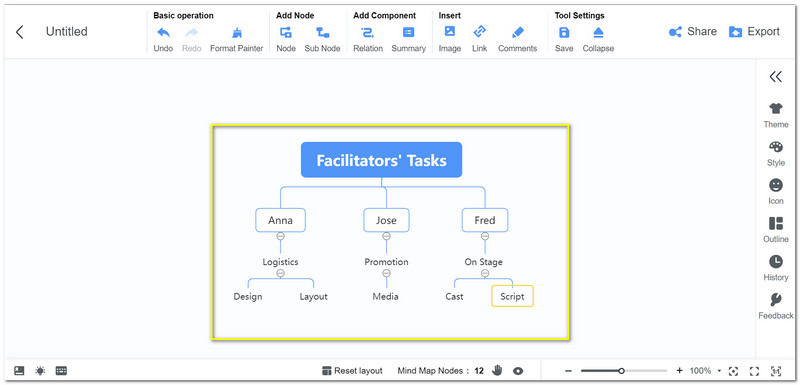
In the middle part, you can see the Main Node. This step will serve as the core of your concept map. As we lay out the map, click the Node or Sub Node under the Add Node. This step will let you visualize the outline you want to create.
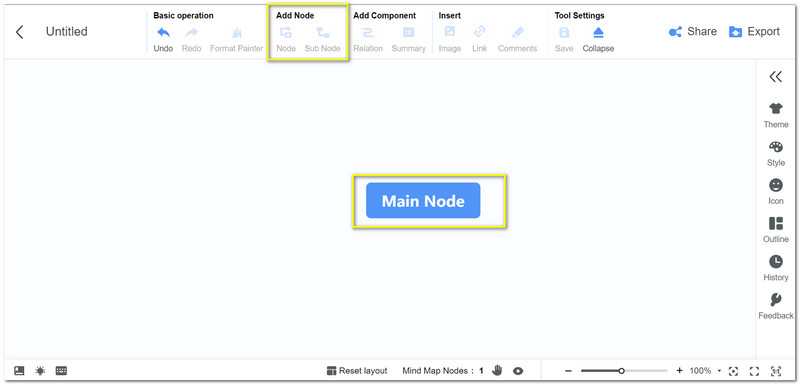
Add more nodes you want and start the layout of your map.
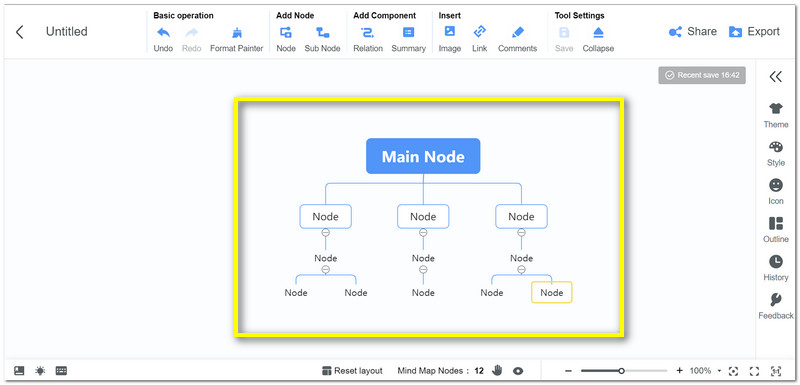
If the layout is now ready, the next thing we need to do is add Text for more details. Double click the nodes to allow us to put labels on them.
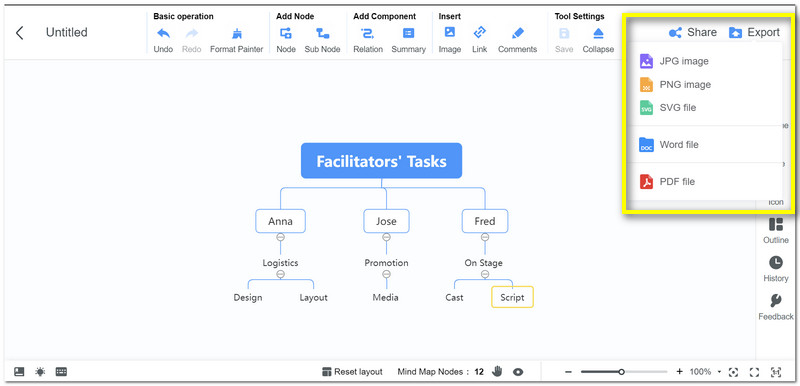
You may now finalize and double-check your maps' details before saving them. Click the Export icon in the top right portion of the website. From there, you may choose the format you want, then keep it in your folders.
Further Reading
Part 4. FAQs
How to insert a Concept Map in Word?
One of the easy ways to add a concept map in Word is by saving the concept map in JPG first. Then, locate the Insert tab in the Word. Go to your Photos and select the Concept Map you want to add to your Document.
May I add photos on my Concept Map?
Yes. You can add images with your Concept map in Word or even in the MindOnMap. Locate the Insert tab at the top portion of the interface or website. Then find the Photos. Click it to go to your folder. Select the visual you want to add from the folder and click Open.
May I manually draw a shape in Word?
Yes. If you are good at withdrawing, you can manually draw a shape for your Concept Map. Go to the Draw tab and select your pen and color. Proceed to the blank Document and draw the shapes now.
Conclusion
Concept Map is essential for organizing our plan and thought. Fortunately, we have Word and MindOnMap, making it possible with ease. We hope this post helps you with your errands. Share this with your classmates so that we can help them too.