Lightning Decision Jam: Definition and Create LDJ Workflow
Lightning Decision Jam, or LDJ, is a structured workshop approach designed to help teams quickly solve a problem and make decisions collaboratively. Instead of endless discussions, LDJ uses a series of timed exercises to identify obstacles, prioritize solutions, and agree on an actionable approach. So, if you want to learn more about LDJ, it would be best to read everything in this post. We cover everything, including its definition, benefits, core principles, how to run it, when to use it, and more. You will also learn how to create an LDJ workflow using the best flowchart maker. Read on to learn more.

- Part 1. What is a Lightning Decision Jam
- Part 2. How to Run a Lightning Decision Jam
- Part 3. Best Practices, Common Mistakes and When to Use Lightning Decision Jam
- Part 4. Create a Lightning Decision Jam Flowchart Using MindOnMap
- Part 5. FAQs about Lightning Decision Jam
Part 1. What is a Lightning Decision Jam
A Lightning Decision Jam is a structured workshop format designed to help teams identify various challenges, create solutions, and agree on actionable steps without any arguments. This model replaces open-ended discussions with timed exercises that encourage clarity and teamwork. Plus, by focusing on problem-solving rather than problem-talking, Lightning Decision Jam ensures that each voice of the participant will be heard.
Benefits of Lightning Decision Jam
Want to explore the benefits of LDJ? Then, you can check all the information below.
- • Efficiency – The good thing about LDJ is that it can cut down long meetings into a clear and time-boxed procedure.
- • Clarity – Another benefit you can get is that it ensures that all participants can contribute their ideas, not just with someone who has a loud voice.
- • Inclusivity – LDJ can offer a structured path from problem identification to actionable solutions.
- • Momentum – The Lightning Decision Jam allows the team to leave with a concrete next step instead of unresolved discussions.
Core Principles of Lightning Decision Jam
After learning the benefits of Lightning Jam, proceed here to get more insights about its core principles.
- • Structure Over Chaos – LDJ uses a fixed sequence of practices to prevent meetings from drifting. It ensures that the team moves step by step without any problems.
- • Action Over Talk – The approach focuses on generating solutions and decisions, not endless arguments.
- • Equal Participation – Each member of the team has an opportunity to share ideas so that no one can dominate the conversation.
- • Visual Collaboration – Both problems and solutions are captured visually. It makes the decision-making transparent and easy to follow.
Part 2. How to Run a Lightning Decision Jam
Want to know how to run a Lightning Decision Jam? Then, read all the steps in this section.
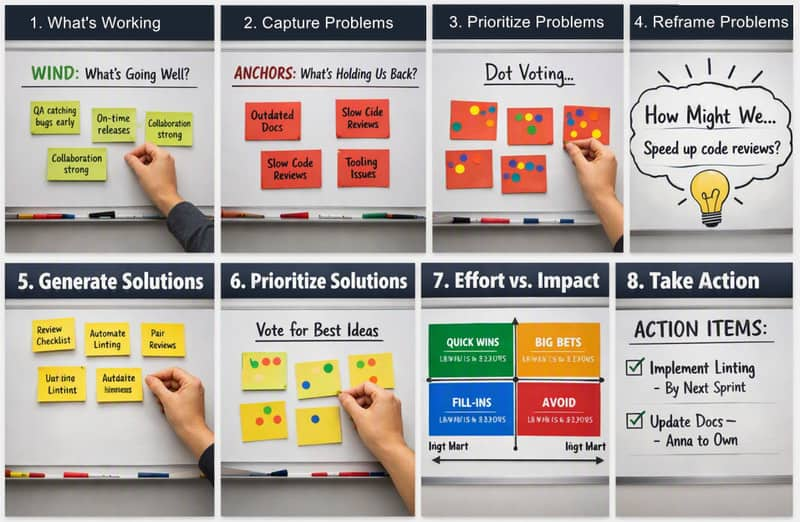
Step 1. Frame the Workshop Topic (5 to 10 minutes)
You must choose one area of the team to enhance or resolve. You must keep the given topic focused enough to guide contributions without any suggesting a solution in advance.
Step 2. Capture the Problem (5 to 10 minutes)
The next step is to capture the problem. Give all the participants a short period of time to think. Then, ask them to add problems related to the topic. Focus on resurfacing issues rather than having an argument.
Step 3. Prioritize Problems (5 minutes)
You can now use a dot-voting method. All participants get a fixed number of votes to place on the problem. The most-voted problem will be the top priority.
Step 4. Reframe Problems (5 minutes)
After selecting the problem, you can begin converting it into solution-oriented prompts. For example, if the problem/issue is 'Code reviews take much time,' turn it into 'How might we speed up the code reviews?'
Step 5. Generate Solutions (10 minutes)
This is the time when you need to brainstorm with the whole team. You can use one sticky note per idea/solution. One of the examples is 'suggesting a review checklist' and 'automate linting.' Using different brainstorming techniques can help participants generate ideas independently before discussing and prioritizing them as a group.
Step 6. Prioritize Solutions (5 minutes)
You can dot-vote again to determine the most ideal ideas or solutions.
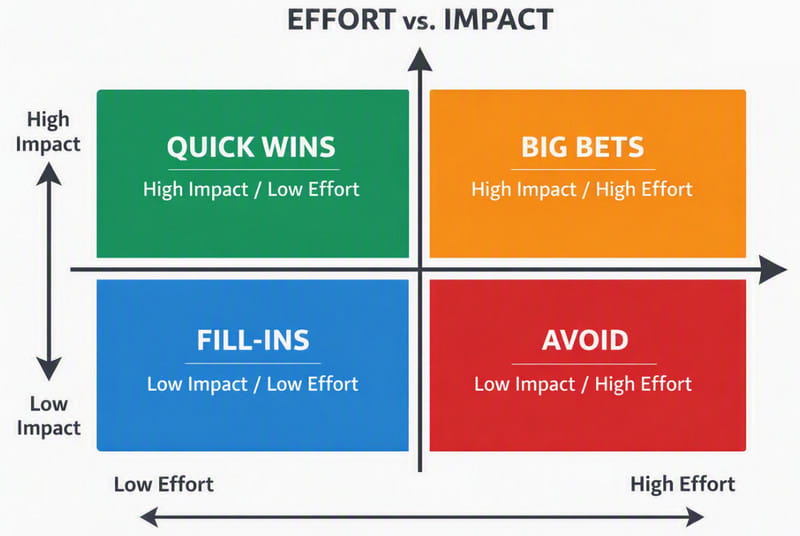
Step 7. Effort vs. Impact (10 minutes)
In this step, you need to plot solutions. You can use a 2×2 grid that shows the effort and impact, like the example below. For decisions involving several competing options, a Pugh matrix can help teams compare alternatives against consistent criteria.
Step 8. Convert Action to Items (5 minutes)
For the last step, you can now start assigning owners and deadlines to top solutions. For example, QA must lead to implementing linting automation by the next sprint.
You can check the example below about LDJ.
Part 3. Best Practices, Common Mistakes and When to Use Lightning Decision Jam
Want to learn more about Lightning Decision Jam? If so, proceed to this section, as we give all the details about its best practices, common mistakes, and when to use it.
Best Practices of Lightning Decision Jam
- • Time-box each step – It keeps the session short. This maintains focus and momentum.
- • Enforce silence during brainstorming – It also prevents dominant/loud voices. It lets each member think without any interference.
- • Use of Visual Tools – LDJ uses various visual tools, such as sticky notes and digital boards, making the ideas tangible and easy to compile.
- • Vote with intention – It has a limited number of votes per member, ensuring equality and avoiding arguments.
Common Mistakes of Lightning Decision Jam
- • Skipping the ‘What’s Working’ step – Immediately starting with the problem can result in negativity and reduce engagement.
- • Letting early discussion – It is better to stick to silent ideation until the voting procedure.
- • Ignoring the time limits – Using a timer is better for discipline and to not to overrun steps.
- • No visual tracking – Without visible boards or notes, some members might get confused. Use visual tracking for better clarity.
When to Use Lightning Decision Jam
- • Team alignment sessions – You can use LDJ for team alignment sessions, especially if you need priorities or next steps.
- • Process improvement workshop – If you want to determine what to work on and what needs improvement, using LDJ is ideal.
- • Remote or hybrid meetings – If you want to collaborate digitally, you can also use LDJ since it is perfect for teamwork/brainstorming.
Wondering about the differences between Lightning Decision Jam and Mind Mapping? Then, you can check the table below.
| Lightning Decision Jam | Mind Mapping | |
| Core Approach | Step-by-step workflow with voting and prioritization | Non-linear diagram connecting ideas around a central theme |
| Focus | Problem identification and actionable solutions | Idea exploration and relationship mapping |
| Collaboration Style | Silent ideation + group voting | Open brainstorming, often collaborative expansion |
| Best For | Decision-making, prioritization, team alignment | Early-stage brainstorming, content planning, creative thinking |
Part 4. Create a Lightning Decision Jam Flowchart Using MindOnMap
Do you want to create a Lightning Decision Jam flowchart as your guide for your session? In that case, you can use MindOnMap Flowchart Creator. This tool is ideal when it comes to creating the output you need. This is because it can offer all the features you need, such as shapes, colors, lines, themes, and more. You can even access various templates to make the process smoother and simple. What we like here is that you can use MindOnMap to brainstorm with other members since it can provide its collaboration feature. It can also save your flowchart in other formats, like JPG, PNG, PDF, and more. So, if you want to check its capability as a flowchart maker, you can follow the instructions below.
Access MindOnMap in your browser. You can also tap the button below to use its desktop version. After launching the interface, start creating your account.
Secure Download
Secure Download
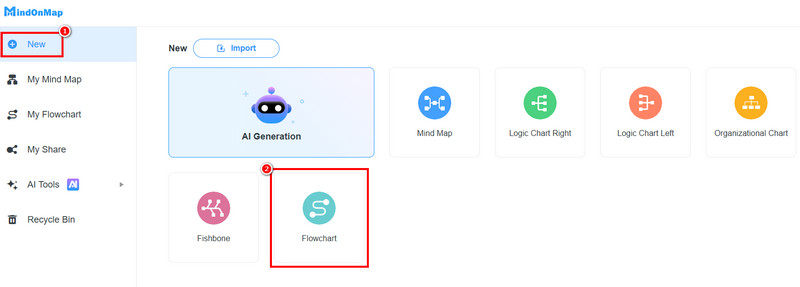
Then, proceed to the New section and choose the Flowchart feature. The main UI will appear on your screen.
You can start creating a Lightning Decision Jam flowchart. You can select all the shapes you need from the General section. Then add text by double-clicking the shapes.
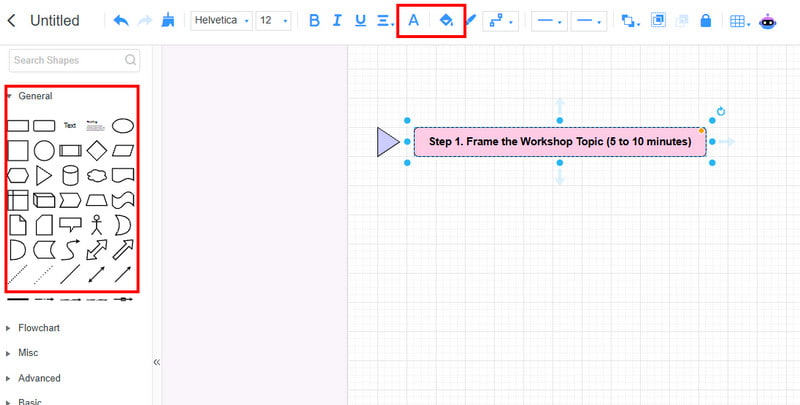
You can also add color to the font and shapes using the Font and Fill Color functions.
Once you are done creating the LDJ flowchart, you can start clicking the Save button to keep the flowchart on your account. To save it on your device, use the Export button.
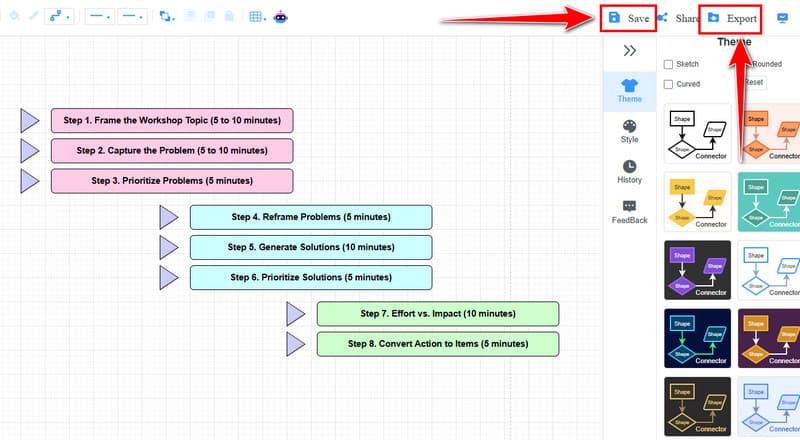
Click here to view the Lightning Decision Jam flowchart designed by MindOnMap.
Part 5. FAQs about Lightning Decision Jam
What are the necessary materials for Lightning Decision Jam?
There are various materials you need, such as sticky notes, markers, voting notes, a timer, and a digital whiteboard.
Who should facilitate Lightning Decision Jam?
The one facilitating the LDJ must be a neutral facilitator who can manage time, guide the group through all steps, and enforce silence during the session and brainstorming.
What is the best tool for LDJ?
Nowadays, it is better to use a digital tool that can help you save all the information. So, if you need the best tool for LDJ, we suggest using MindOnMap. This tool can help you enter all the information and create a well-structured output, making the session more engaging and better.
Conclusion
Now, you have learned everything about Lightning Decision Jam, along with its benefits and principles, best practices, common mistakes, and other information. Plus, you have discovered MidnOnMap as a reliable tool for creating a well-designed and comprehensive Lightning Decision Jam flowchart. Thus, if you want to learn more about the discussion and the tool for visualization, always use this post as your reference.