A Remarkable Step-by-Step Procedure on How to Do a Timeline in Word
A timeline is crucial in managing schedules in meeting deadlines and so true in managing challenging projects within a period. Furthermore, you can efficiently monitor the projects’ progress with a timeline and vice versa. Not to mention its usage in depicting historical milestones. On the other hand, Microsoft Word is probably the most popular document processing software besides Google docs. Hence, you must know how to make a timeline in Word to be able to do the task anytime you need to. As everyone knows, almost all computer devices contain Microsoft Word, and it’s rarely spared.
Luckily, you found this article, for it will give you nothing but an efficient way of making a timeline. So without further adieu, let’s get started and enjoy reading the succeeding information below.

- Part 1. How to Make a Timeline in Word
- Part 2. The Best Alternative to Word in Making a Timeline
- Part 3. FAQs About Word and Making Timeline
Part 1. How to Make a Timeline in Word
As mentioned above, Microsoft Word is one of the most popular software around the globe. For this reason, everyone knows how flexible and multifunctional this is, for it can even be used for making maps, graphs, diagrams, and timelines alike. And, so let’s meet the detailed steps below on how to construct a timeline in Word.
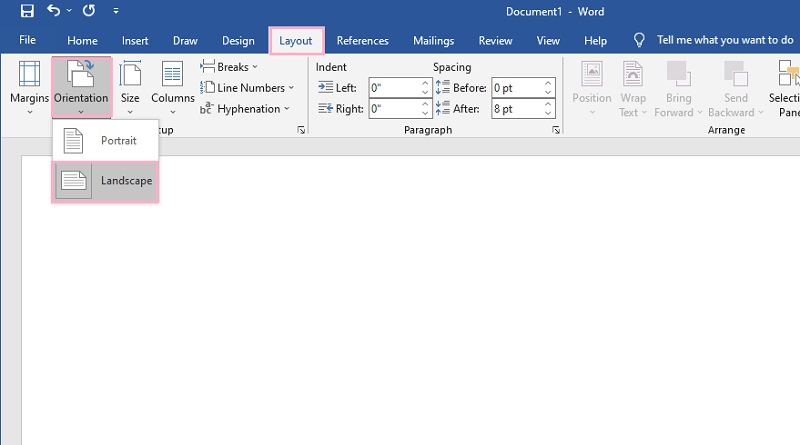
Setting a Landscape Orientation
First and foremost, let’s set the page from a portrait into a landscape. This is because of the horizontal requirement of the timeline. So, launch the timeline maker and open a blank page. Then, go to Layout > Orientation, then choose Landscape.
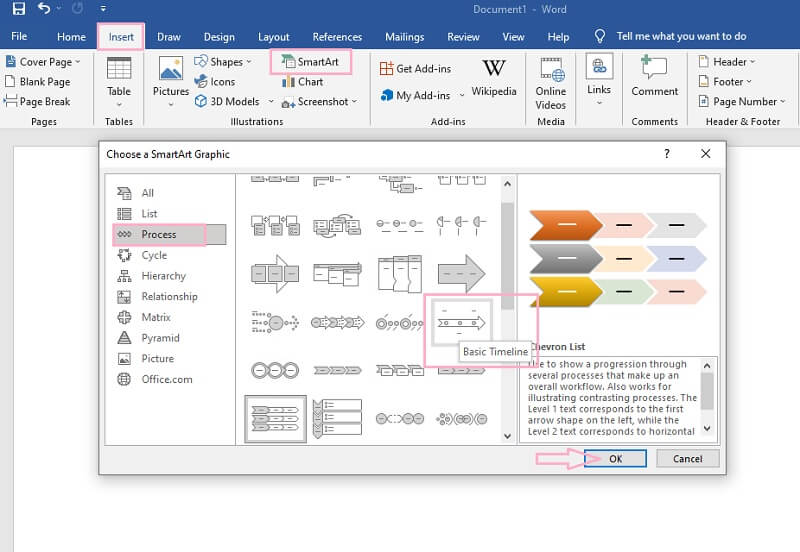
Insert a Timeline Template
Now, start by inserting a template from its SmartArt feature. How? Click the Insert tab, then the SmartArt feature. After that, a popped-up window will appear where you are free to choose among the hundreds of templates available. But, for the timeline template, go to the Process, and choose the arrow with three dots inside it, for it’s the basic timeline template it has. How to insert that timeline in Word? Click OK.
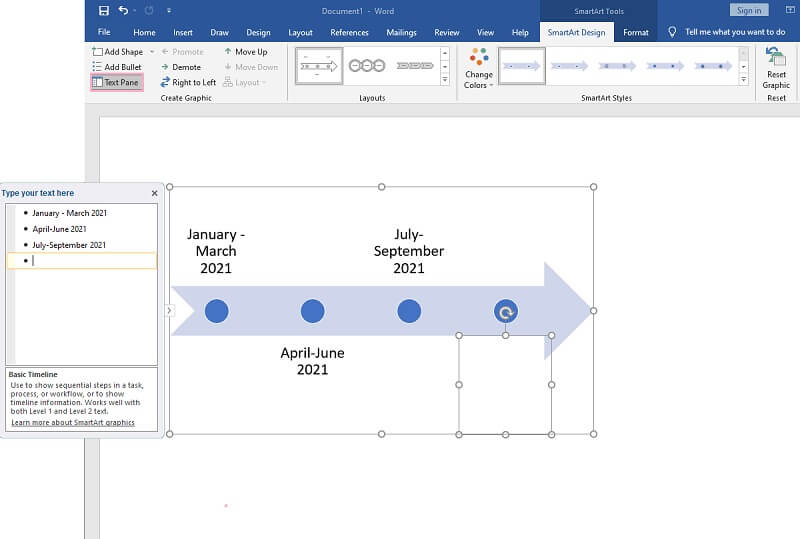
Label and Expand the Timeline
Now, start naming the events by editing on [Text] selections. Go to the Text Pane to expand the timeline, then hit the ENTER tab from your keyboard to add events. However, please note that it would be better not to add more than seven events, for it will make your timeline blurry.
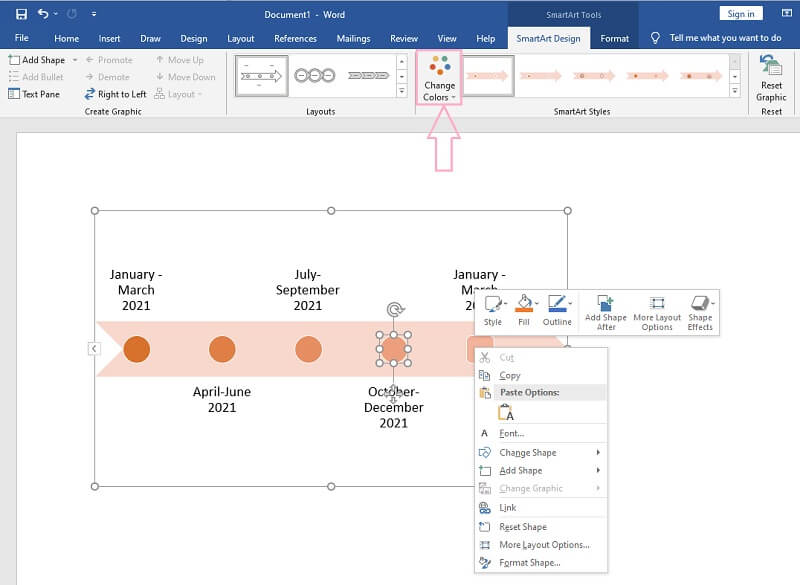
Customize the Events
Next is customizing the events by changing the color, fonts, and shape. You may go and look for the Change Colors under the SmartArt Design to change the color. Otherwise, please right-click on the timeline and customize it from the given presets. That’s how to design a timeline in Word.
Insert Images and Arrows (Optional)
Lastly, you have the option to add arrows, icons, and images to your timeline. Go to the Insert, then choose among the illustrations that you need to include. Then, finally, save it by going to the File, then Save As. Click here to learn how to make a mind map in Word.

Part 2. The Best Alternative to Word in Making a Timeline
If you don’t have Microsoft Word on your device, we highly recommend using MindOnMap. Why? Because this mind mapping tool is a web-based tool that enables users to create mind maps, diagrams, and timelines without spending any dime, unlike the high price when using Microsoft Word and how to make a timeline with it. Imagine you don’t need to download, and at the same time, pay anything to use it. Moreover, don’t hesitate to use it due to Ads, because we swear that you won’t experience any commercials and promotions while using it!
The MindOnMap offers the most intuitive interface when it comes to its usage. In fact, first-time users won’t need assistance, for it has its own hotkeys feature. Also, just like Word, this fantastic online mapping tool offers awesome stencils, features, and presets that make an impacting impression on users. Therefore, let’s dig into the most straightforward guidelines on how to create a timeline with it besides Word.
Secure Download
Secure Download
Log in to Your Email
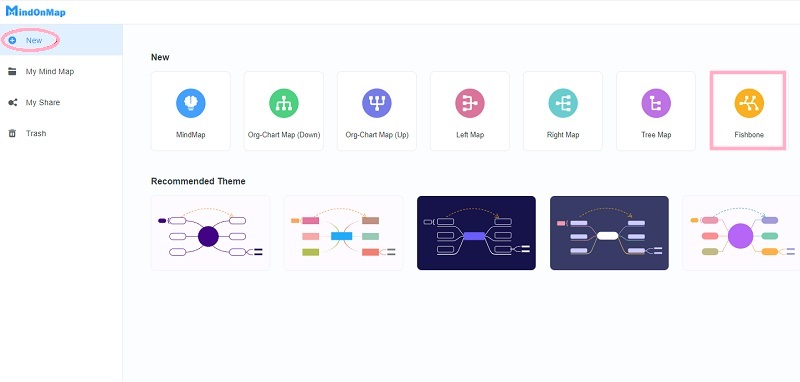
Go to your browser, and search for the official website of MindOnMap. Then, log in using your email account after clicking the Create Your Mind Map. Subsequently, on the main page, choose the New tab to see the various templates themed and not. But since we will work on a timeline, please choose the Fishbone template.
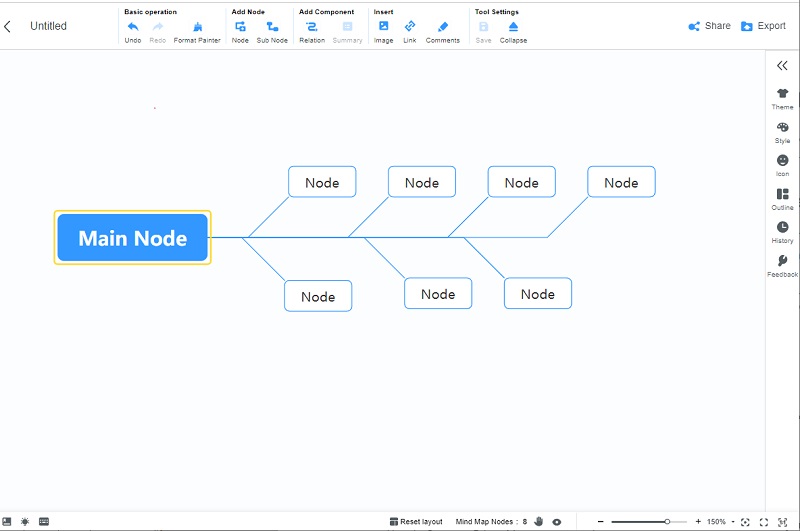
Create the Timeline
You will see a single node that says Main Node on the main canvas. Click it, then hit the TAB button on your keyboard to add more nodes for your events.
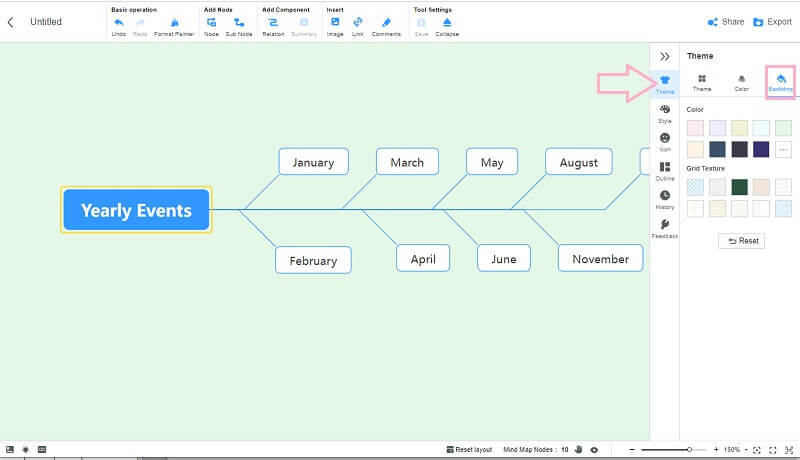
Optimize the Timeline
Now, just like the procedure on how to design a timeline in Word, feel free to optimize the timeline. How? Put a label on the nodes for your events, and make it colorful by configuring on the Menu Bar. Start with the Background, when you go to the Theme, then Backdrop.
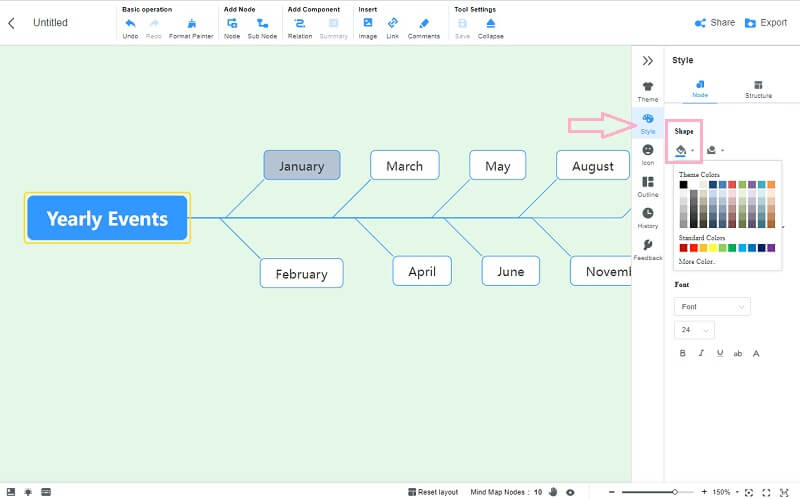
Now, to change the color of the nodes, go to the Style. Then, choose the node you want to fill the color with, and click the color you chose under the Shape.
Insert Illustrations and Components
Now, get your timeline some illustrations like images, comments, links, and arrows of connections. Just navigate to the Ribbons on top of the timeline, and feel free to add according to your preference. Oh, and to add some icons, go back to the Menu Bar, and hit the Icon selection.
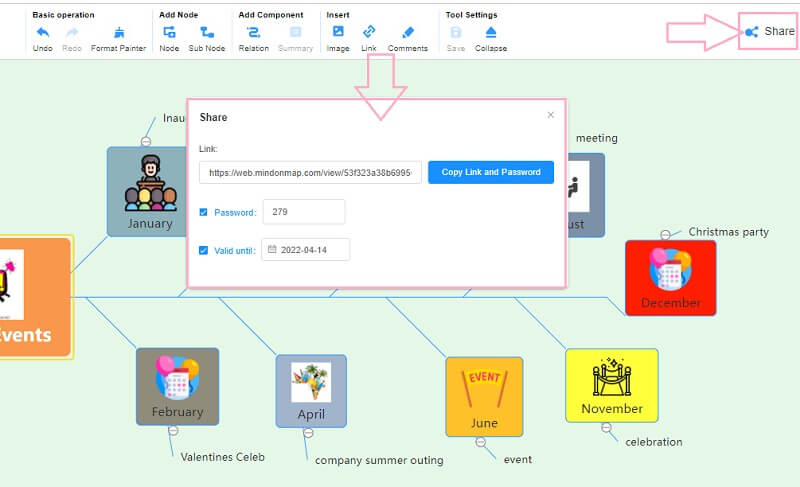
Share the Timeline
Unlike how you make a timeline in Word, MindOnMap enables collaboration via sharing. If you want your colleagues to see your timeline, click on the Share tab, then customize the parameter settings shown. Then, click the Copy Link and Password, and send it to your friends.
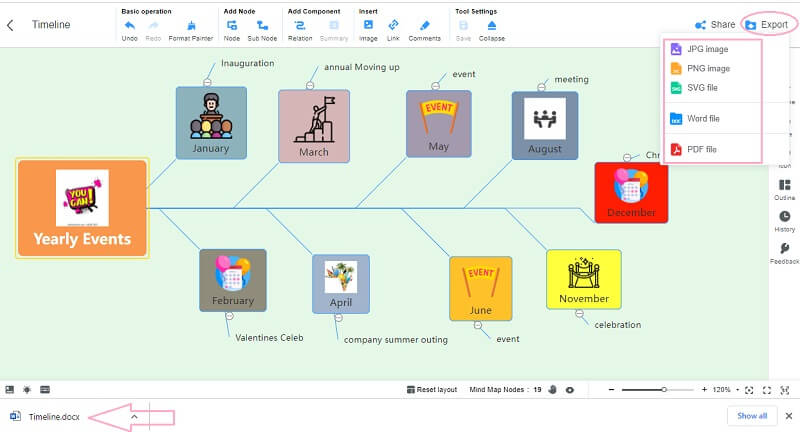
Download the Timeline to your Device
Since you already have an account, it will keep all your projects under the My Mind Map selection from the main page. However, if you want to have a copy of it on your device, hit the Export button. Right after you select a format, you will notice that it will immediately download the file. You can also use this way to make a mind map about yourself.
Part 3. FAQs About Word and Making Timeline
How to insert a timeline from my gallery in Word?
If you wish to insert your ready-made timeline in Word, you may go to the Insert then, Pictures. However, since it is an image, you won’t be able to revise it.
Can I make a timeline using Paint?
Yes. Paint is a graphic editor that contains the basic stencils that are good for making timelines. However, it will require your patience to make one because you will need to use manual procedures.
Can I use a timeline when presenting the evolution of man?
Yes. Since the evolution of man has a timely process, a timeline is the best map to use to illustrate it.
Conclusion
There you go, the detailed steps on how to make a timeline in Word. You can now use this software to plot your schedule or manage a project by a timeline. However, if you find the Word inconvenient, go for the MindOnMap.