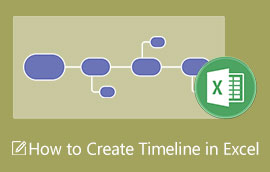
How to Make a Timeline in Visio - Default and Alternative Methods
Timelines are visual representations used for capturing events and relevant details. It organizes events in chronological order, allowing you to understand the events. With this visual tool, teams and members can keep updated with the milestones, achievements, and challenges encountered on the tasks. It often appears in business and academic fields as it provides essential details.
More importantly, it could help you analyze the tasks covering the past, present, and future. If you are into making this visual tool, Visio is a perfect program. It provides the functions and features necessary to make flowcharts and diagrams. Therefore, we made a Visio timeline tutorial you could follow along. Check it out below.

- Part 1. How to Create a Timeline with the Best Alternative to Visio
- Part 2. How to Create a Timeline In Visio
- Part 3. FAQs About Creating A Timeline
Part 1. How to Create a Timeline with the Best Alternative to Visio
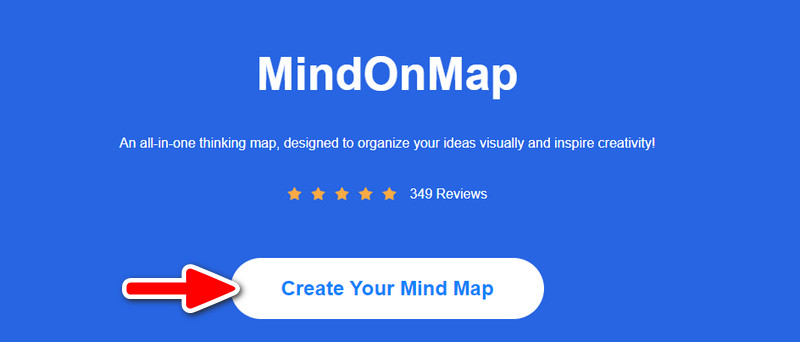
Before proceeding with the Microsoft Visio timeline tutorial, let us look at its great alternative, MindOnMap. The program could assist you in producing a competent timeline in less than a minute. Moreover, it promotes creativity for it enables you to access icons and figures from its comprehensive icons library.
Also, it enables you to add pictures to branches making the map easy to understand. Not to mention, users are capable of adding links for additional information. Additionally, you can customize the color fill, line color, line style, connection line, and structure as per your requirements. In other words, the program has a lot to offer. In case you are interested in learning how to draw a timeline in Visio alternative, see the steps provided below.
Secure Download
Secure Download
Access the tool’s website
First, go to MindOnMap’s official website. You can open any browser you prefer available on your computer. Then, type the link of the tool on the address bar and hit Enter to reach the main site of the tool. Next, click the Create Your Mind Map to start using the program.
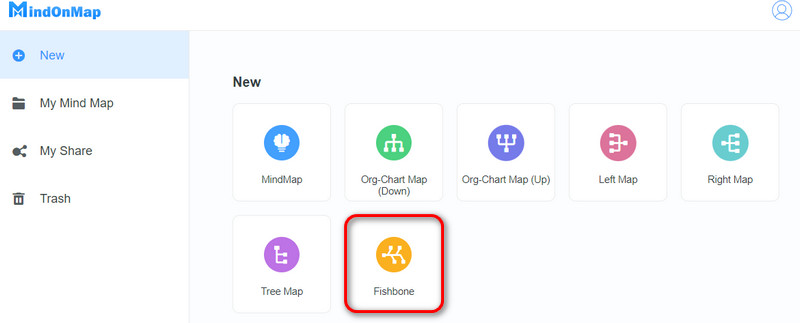
Select a template
On the next page, you will arrive at the template section of the program. Here, you will have the option to create from a template or scratch by selecting a map layout. In this tutorial, let us choose the Fishbone style for making a timeline.
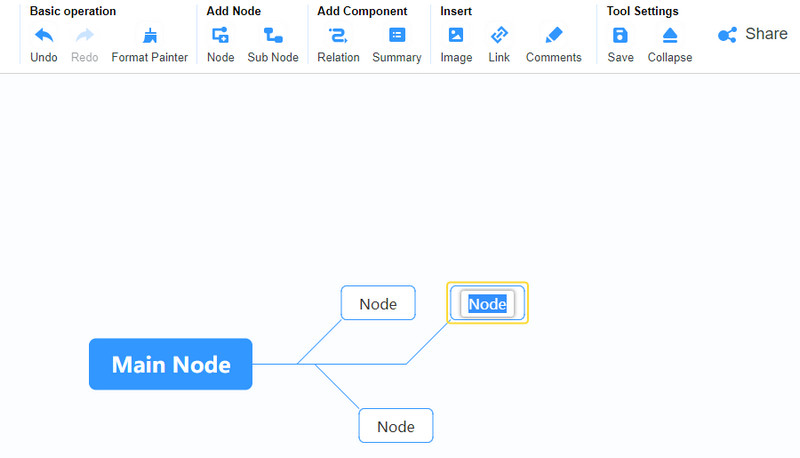
Start creating a timeline
After that, you can now begin making your timeline. Select the Main Node and press the Tab key on your computer keyboard to add branches. You may also add branches by clicking the Node button on the top menu. Keep doing so until you reach the required number of nodes. Right after, double-click on the node and key in the details of your timeline.
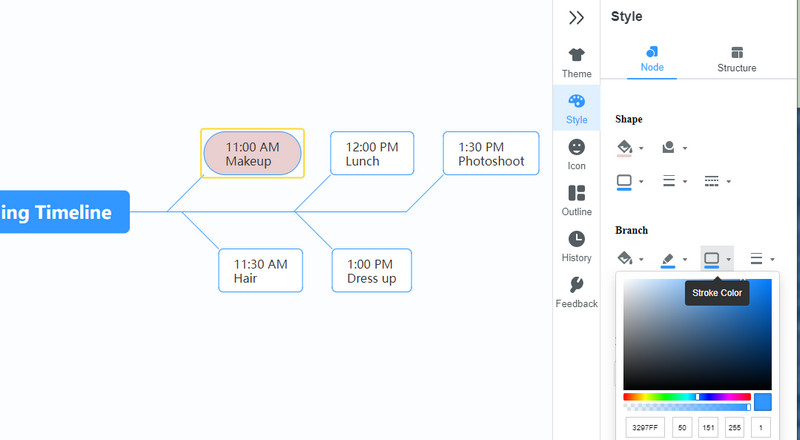
Personalize the timeline
If you wish to personalize your timeline, you can add some creative elements offered by the program. Expand the Style menu on the right-side panel. Now, adjust the properties, like the shapes, fill color, lines, branches, and fonts.
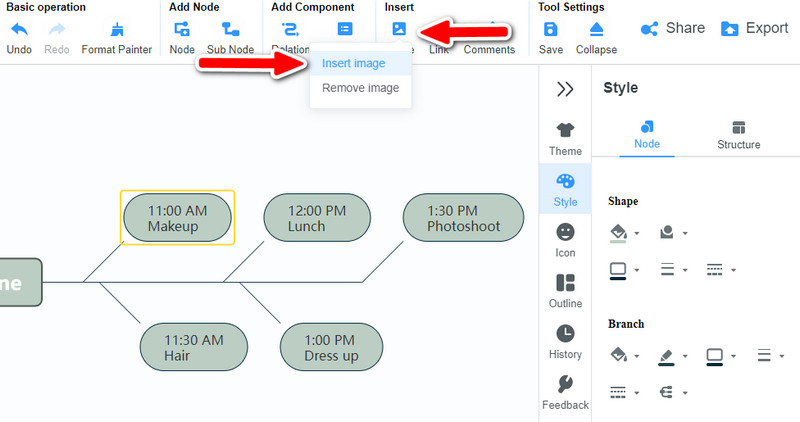
4.1. You can add pictures representing the events by clicking the Image button at the top right portion of the interface. Following that, hit the Insert Image button. This time, browse and select the photo you wish to insert.
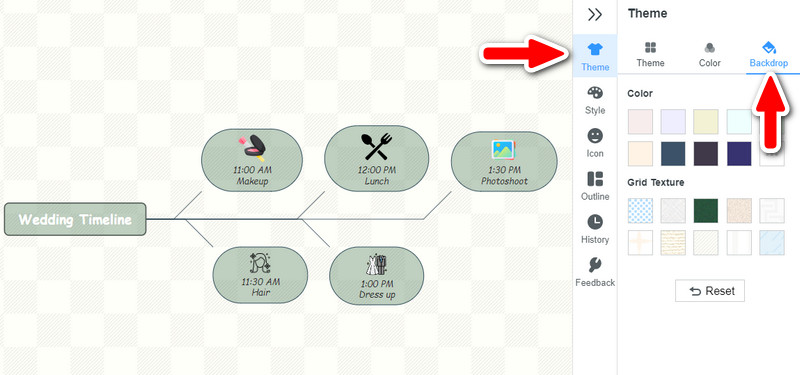
4.2. In case you would like to customize the background of your timeline, then please go to the Theme section. After that, navigate to the Backdrop tab and select a background for your map. You can either choose from the solid background or grid texture.
Export the timeline
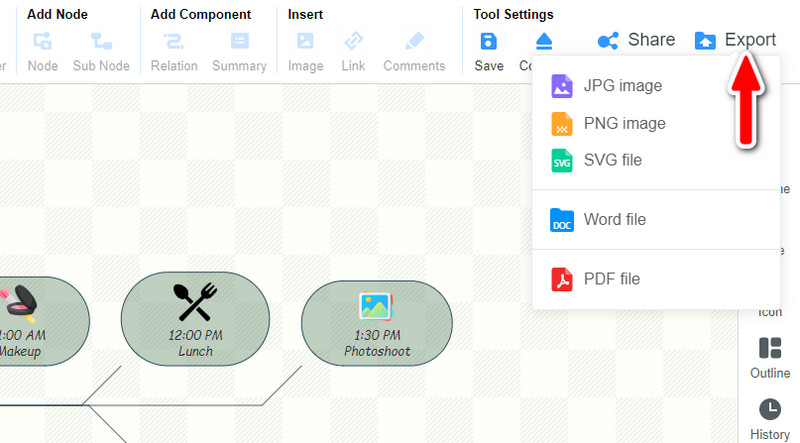
If you are already pleased with the appearance of your timeline, you can now export it. Click on the Export button on the top right corner of the interface. Then, choose a format that suits your needs. You can choose between the image and document formats.
Part 2. How to Create A Timeline In Visio
Microsoft Visio is a dedicated diagramming tool for constructing timelines and other diagram-related tasks. It supports necessary elements, like milestones, events, dates, and many more. In addition, you can choose to use a block or cylindrical timeline. In particular, you can add different milestones, including pin milestone, diagram milestone, line milestone, triangle milestone, etc. Furthermore, it comes with various stylish designs to beautify the look of your timelines. On the other hand, if you wish to learn how to make a timeline in Visio, you can follow the tutorial below.
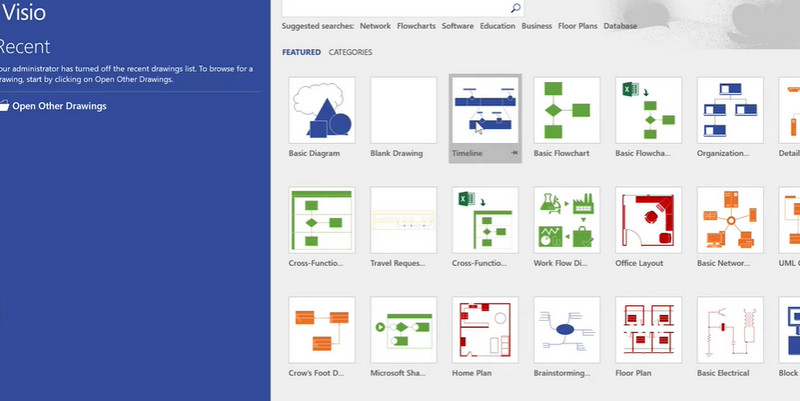
Get the timeline creator and launch it on your computer. After that, you will be welcomed with several templates, including a timeline. You can type Timeline in the search bar field or just pick it from the selection.
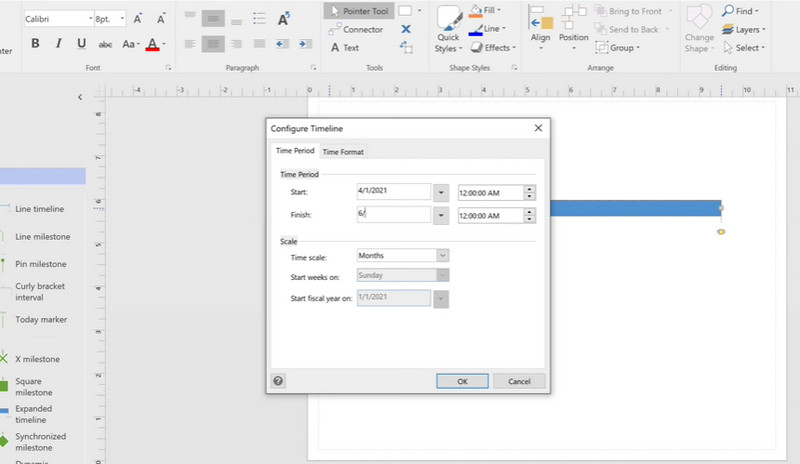
On the next page, a blank drawing canvas will be presented to you. Now, from the Shapes section on the left side panel, select a stencil and drag it to the canvas. By default, dates are set as part of the timeline shape. But you can edit it by right-clicking on the timeline. Then, select Configure Timeline.
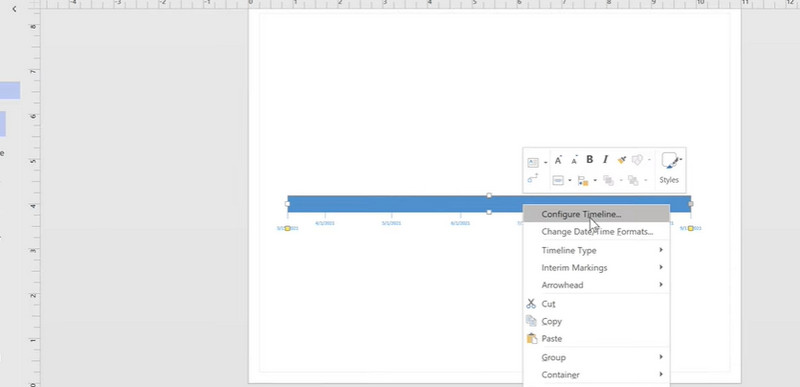
You will be presented with a dialog box to edit the Time Period and Time Format. Edit the properties and hit OK to save the changes.
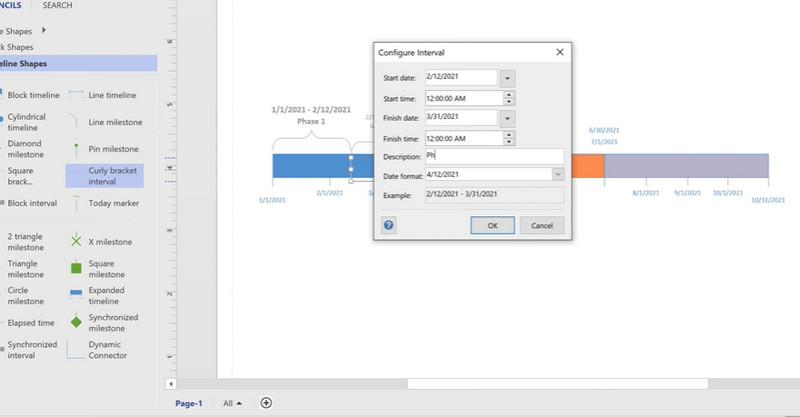
If you wish, you could add intervals from the Shapes library. After that, edit the date according to your requirements. Along with that, you may add milestones and edit the properties accordingly. Add labels by inserting a textbox.
Finally, go to the File section and export the file. From the menu, select Export and choose a file format.
Further Reading
Part 3. FAQs About Creating A Timeline
How to create a timeline in Visio without dates?
With Visio, you can also create a timeline that is not date-specific. To make it possible, you must turn on the developer option and turn off dates, including other things.
How to create a swimlane timeline in Visio?
You can create a swimlane timeline in Visio by selecting a Cross-Functional Flowchart from the template section. By then, you can edit this swimlane timeline.
Can I make a timeline on Word?
Yes. This program has a SmartArt feature that offers various templates, including the timeline.
Conclusion
A timeline is vital in almost all organizations to help them keep track of their progress and faults to avoid. As we know, many tools could assist you in creating a timeline. Meanwhile, if you are looking for a dedicated program, Microsoft Visio is second to none. The program provides the essential elements for creating a timeline. Hence, a Microsoft Visio timeline tutorial is written for your guidance. Moreover, if you are looking for a convenient tool, you will never go wrong with MindOnMap. It is free and grants necessary tools for timeline creation.